
A Complete List of My Travel Photography Gear
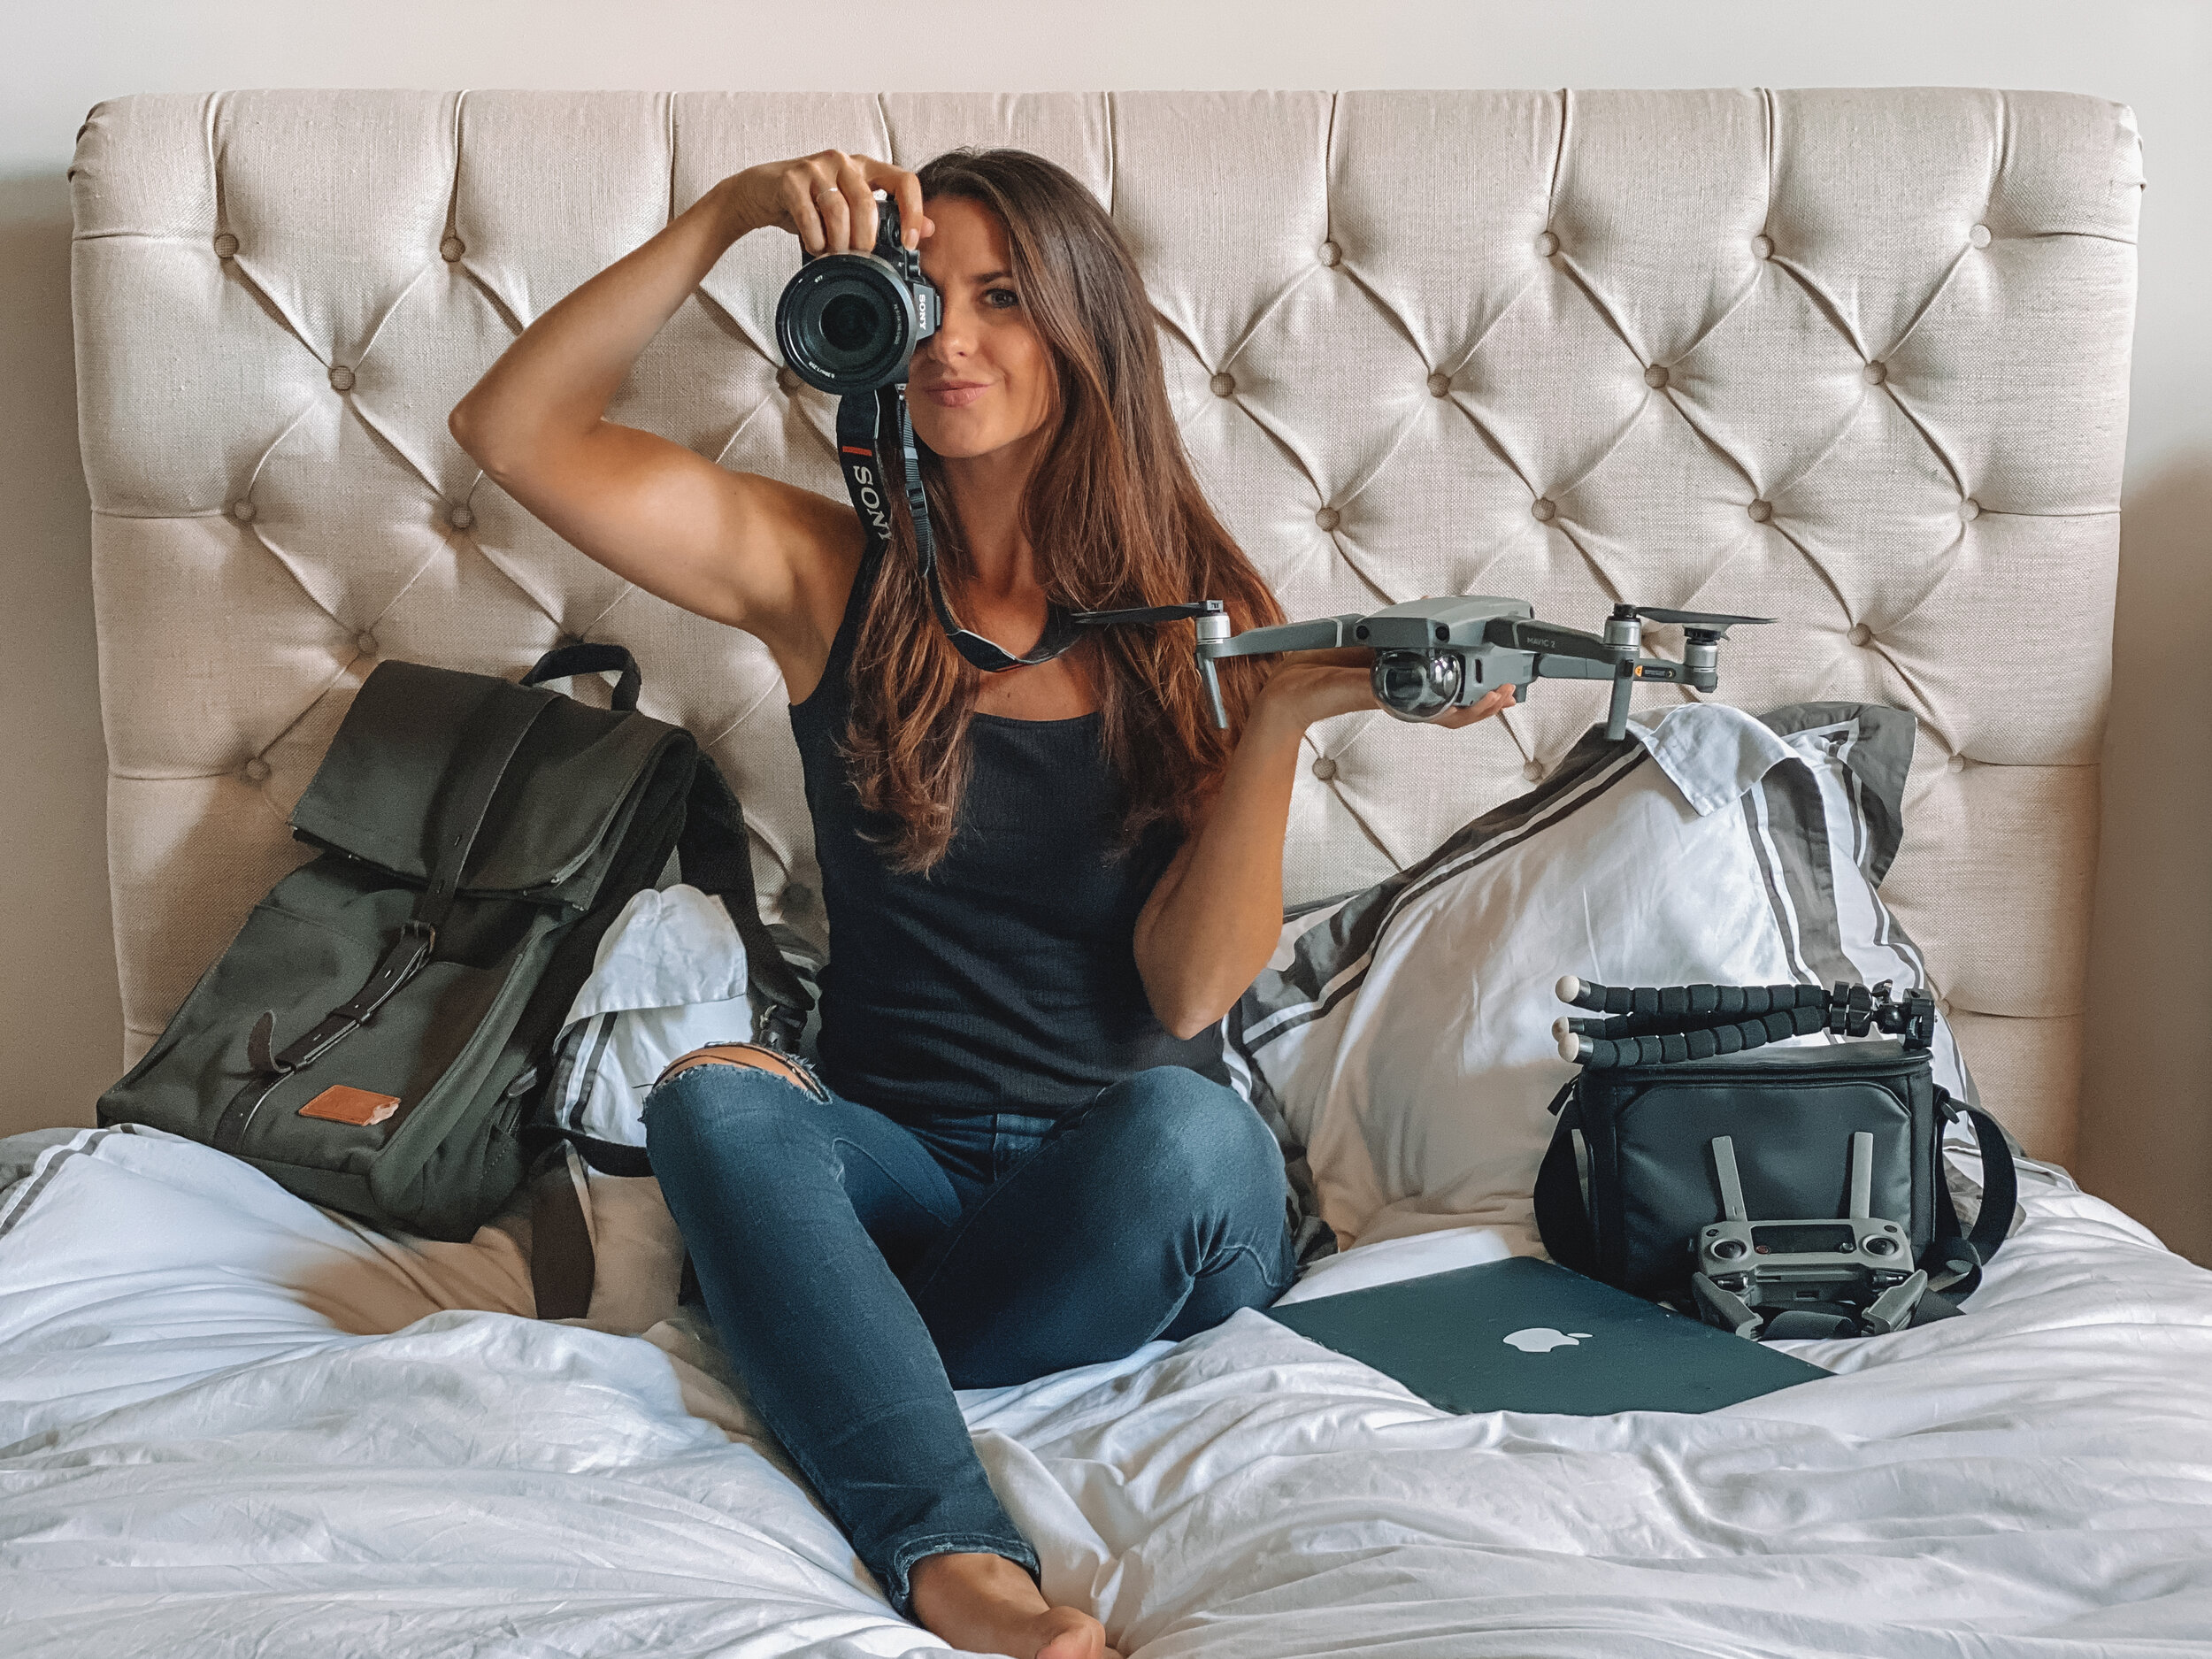
I’m @girlgoneabroad on Instagram, and posting photos of my full-time travel life has (much to my surprise) resulted in a dedicated following of over 90,000. I am frequently asked what camera I shoot with, what lenses I use, what drone I fly, how I take my own photos, and if I have any recommendations for camera bags. Well, look no further! Here’s the rundown on all of the equipment I’m currently hauling around the globe.
Some links below are affiliate links. This means if you click the link, I may make a small commission if you purchase something from the website at no extra cost to you. When you are ready to make your purchase consider using one of the links below to help support this blog. I only recommend products that I personally use and trust.
WHAT I SHOOT WITH
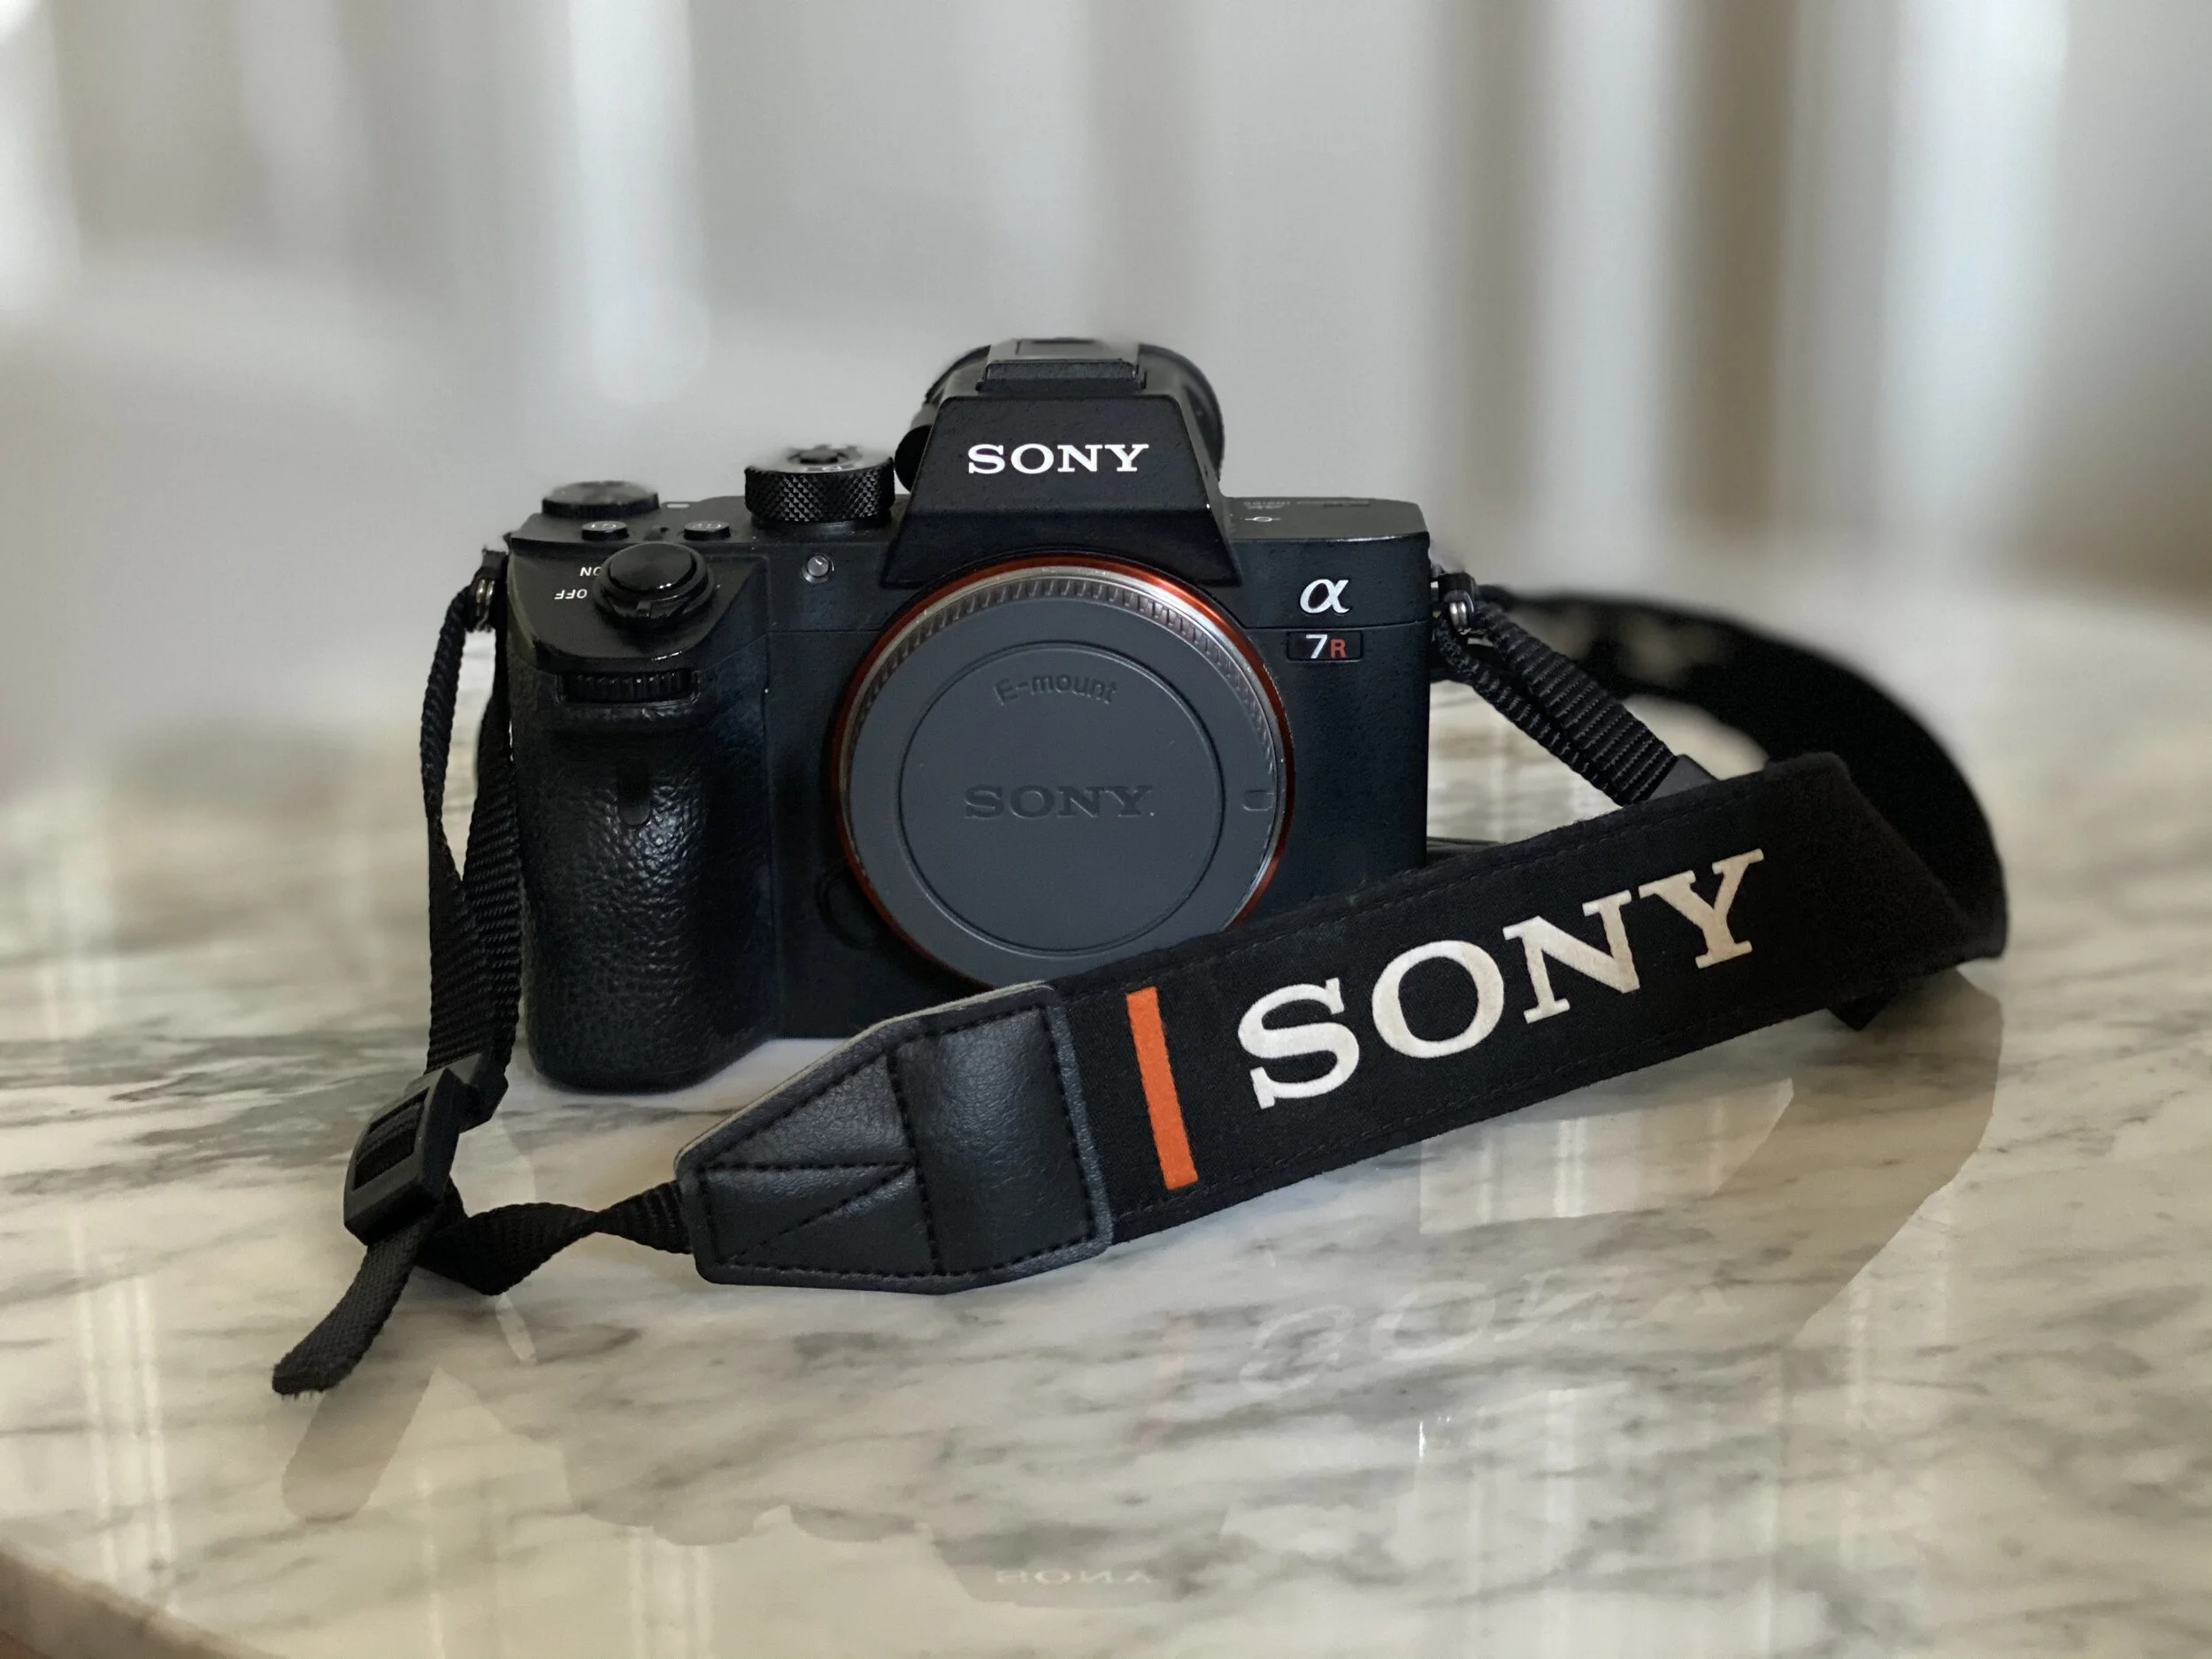
Sony A7R III
A few years ago I upgraded from a Canon 70D to a Sony A7R III. In doing so, I went from a crop sensor to a full frame, and nearly doubled the quality of my photos- from 24 megapixels to 42 megapixels. Why does that matter? Well, unless you’re making prints or getting featured on a billboard, it probably doesn’t. What I can tell you is this- if I take a photo from a distance, when I zoom in and crop that image, little to no quality is lost. 42 MP images are SHARP. An image taken on an iPhone 13 Pro is 12 MP, to give you a better idea.
Now, I firmly believe that you don’t need the best camera on the market to take a good photo or have a beautiful Instagram feed. Remember that YOU take the photo, not your camera. If you have a natural eye for photography, you can produce a nice image using just about anything. That said, I do think there is a distinct difference between an image taken on my Sony and one taken on my iPhone, for example. Taking professional quality photos will set you apart from other accounts, because even when Instagram decides to reduce the quality, there IS a difference.
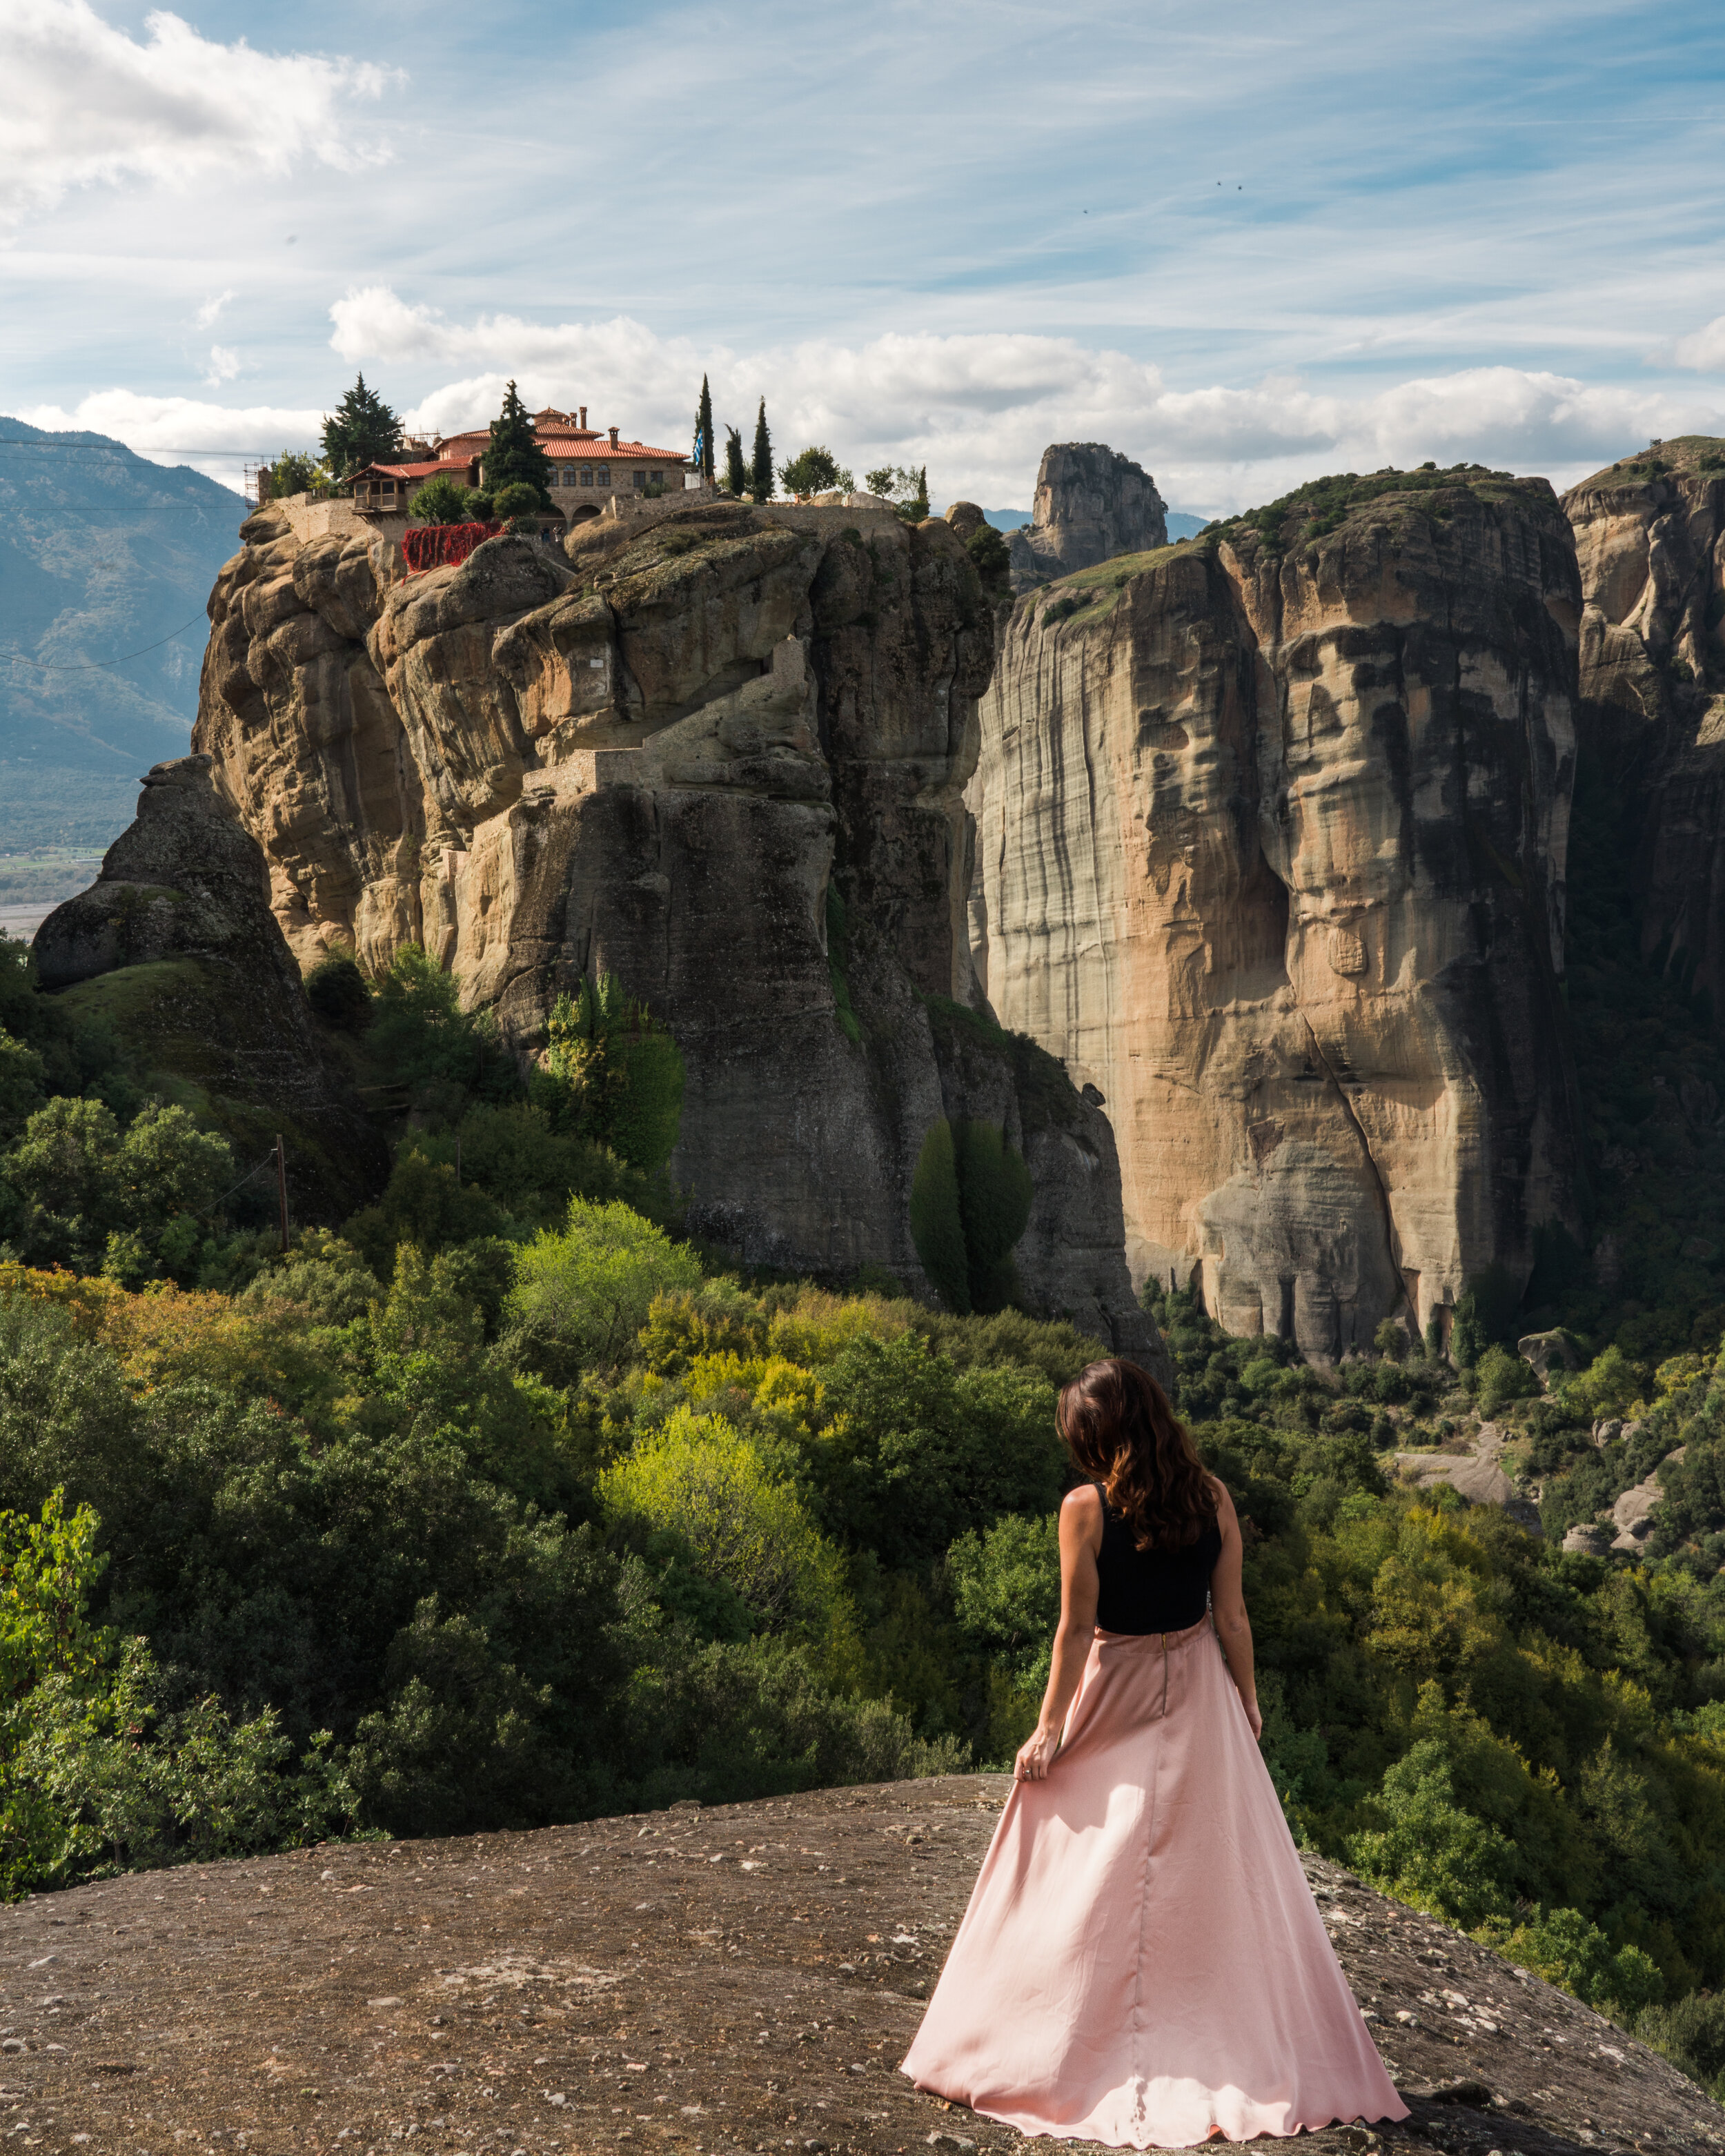
Sony FE 24–105 mm F4 G OSS Lens
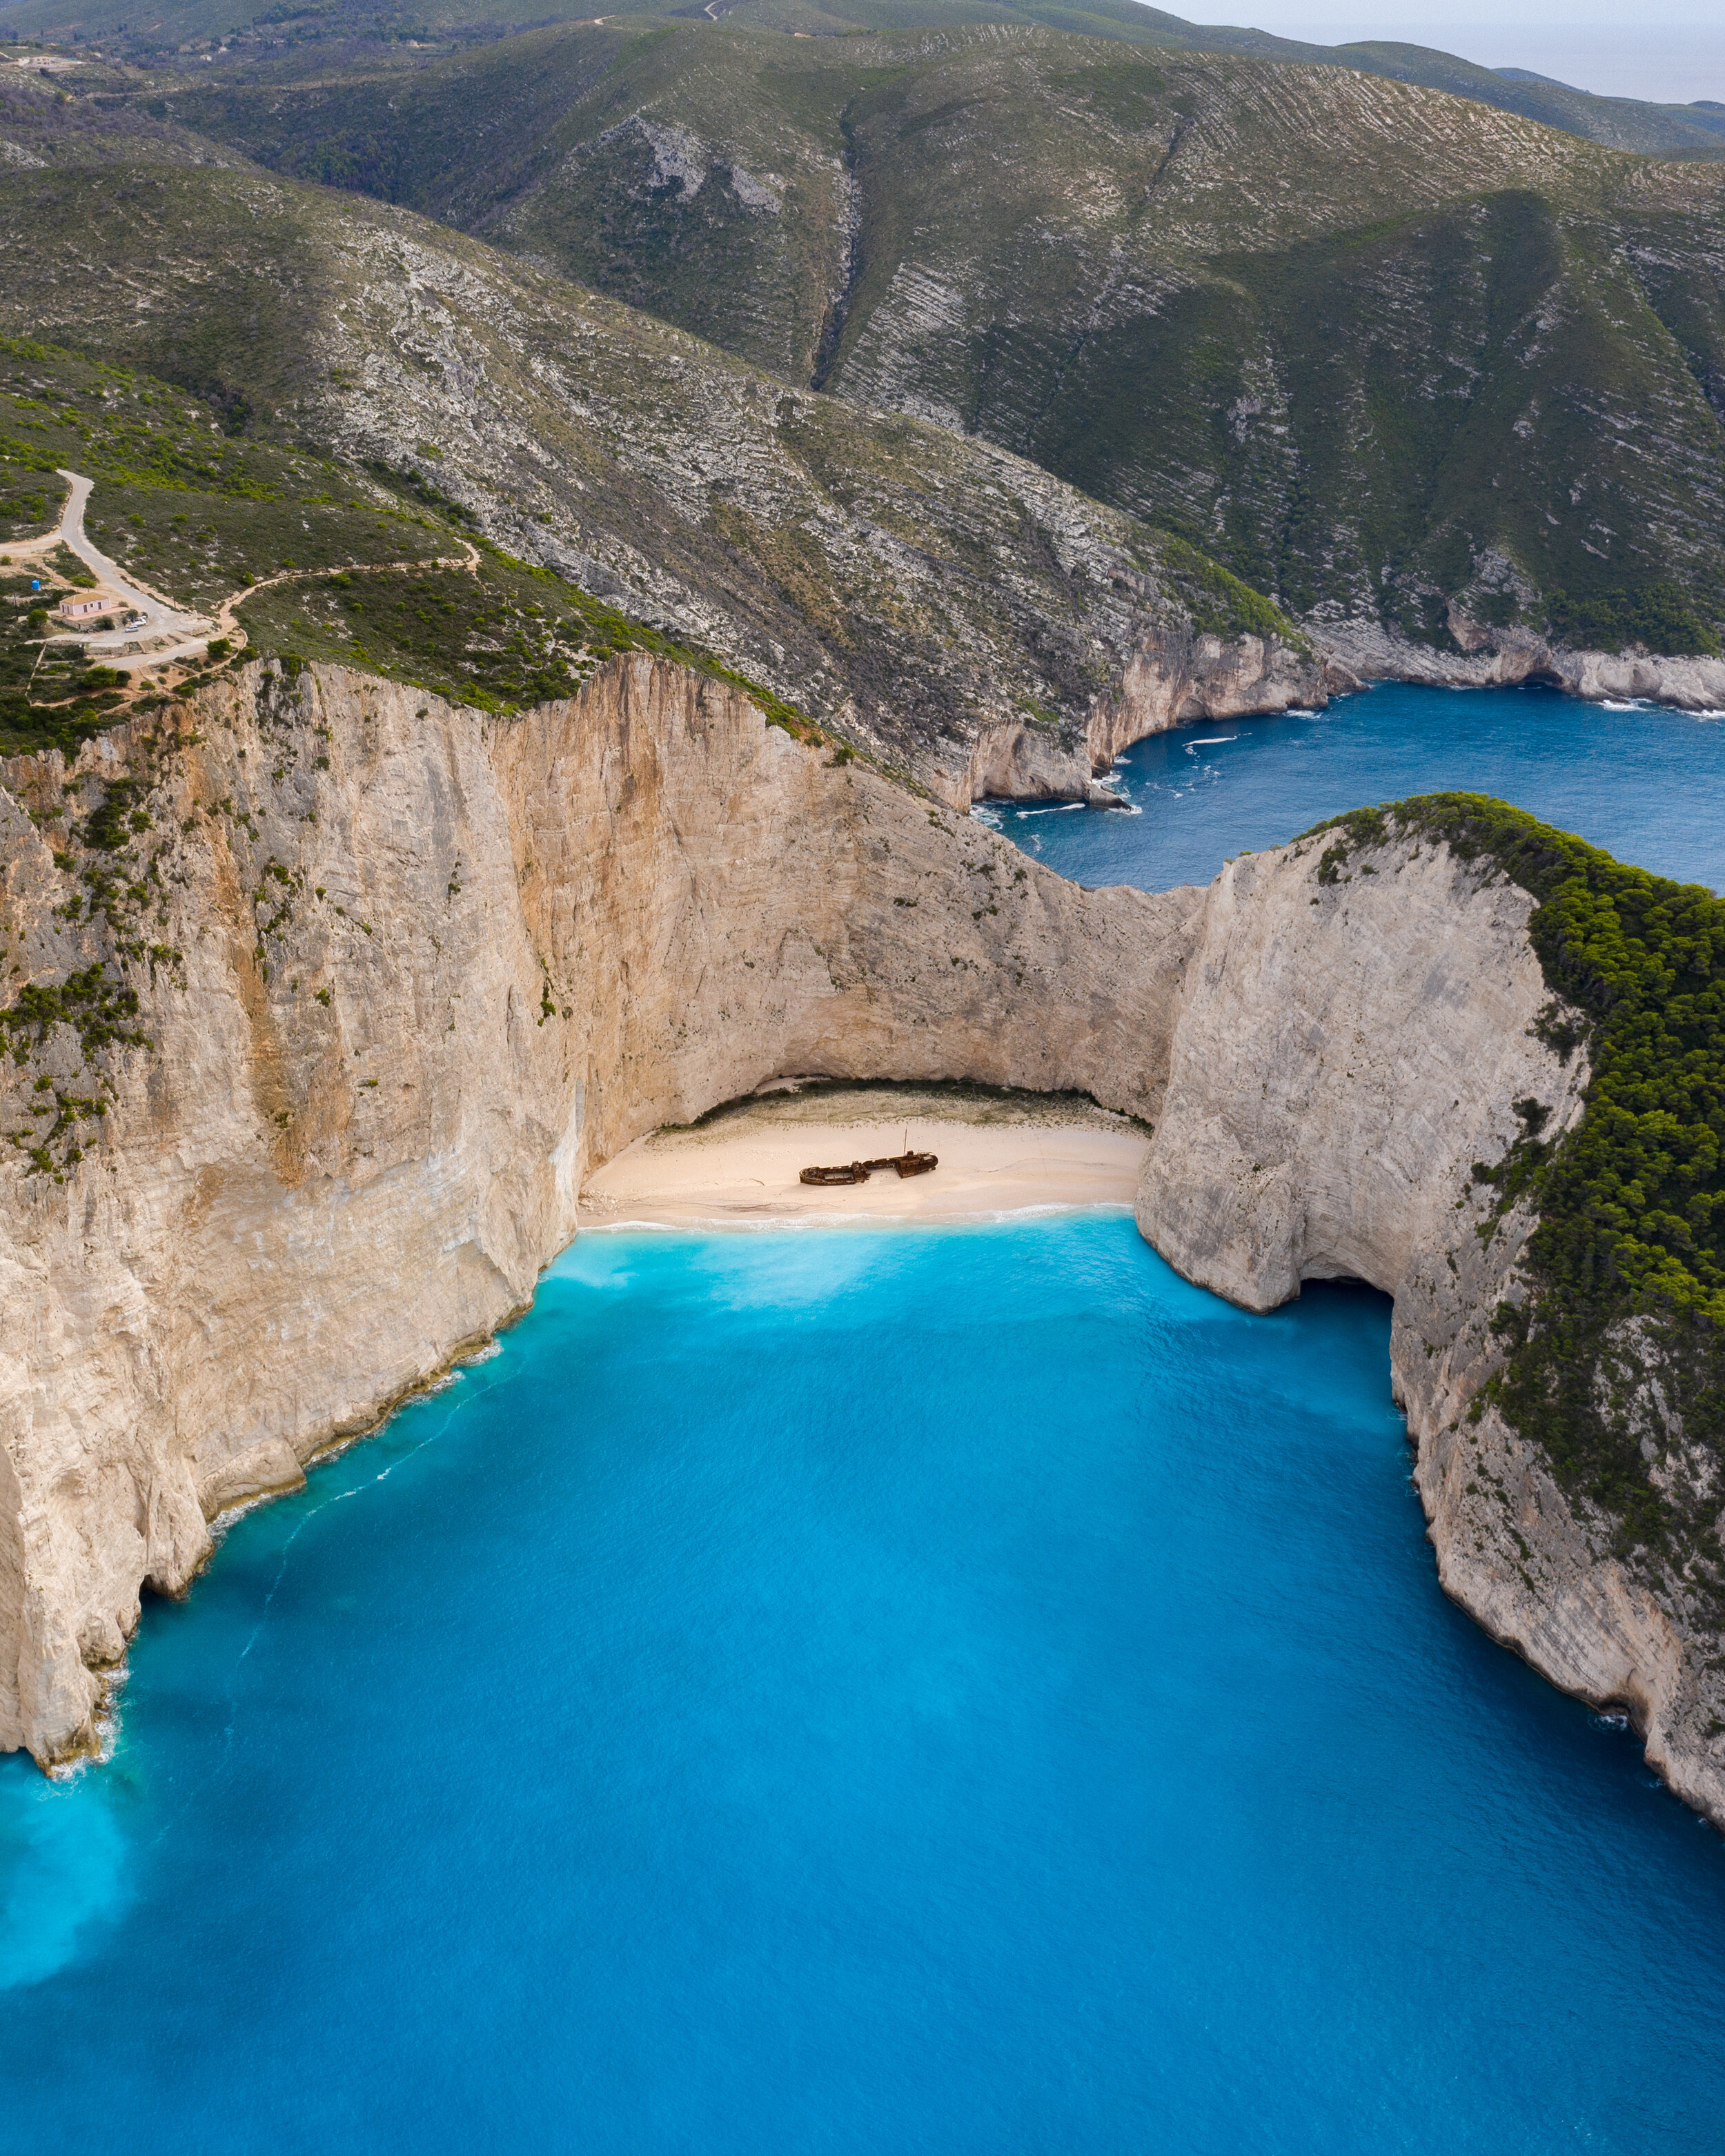
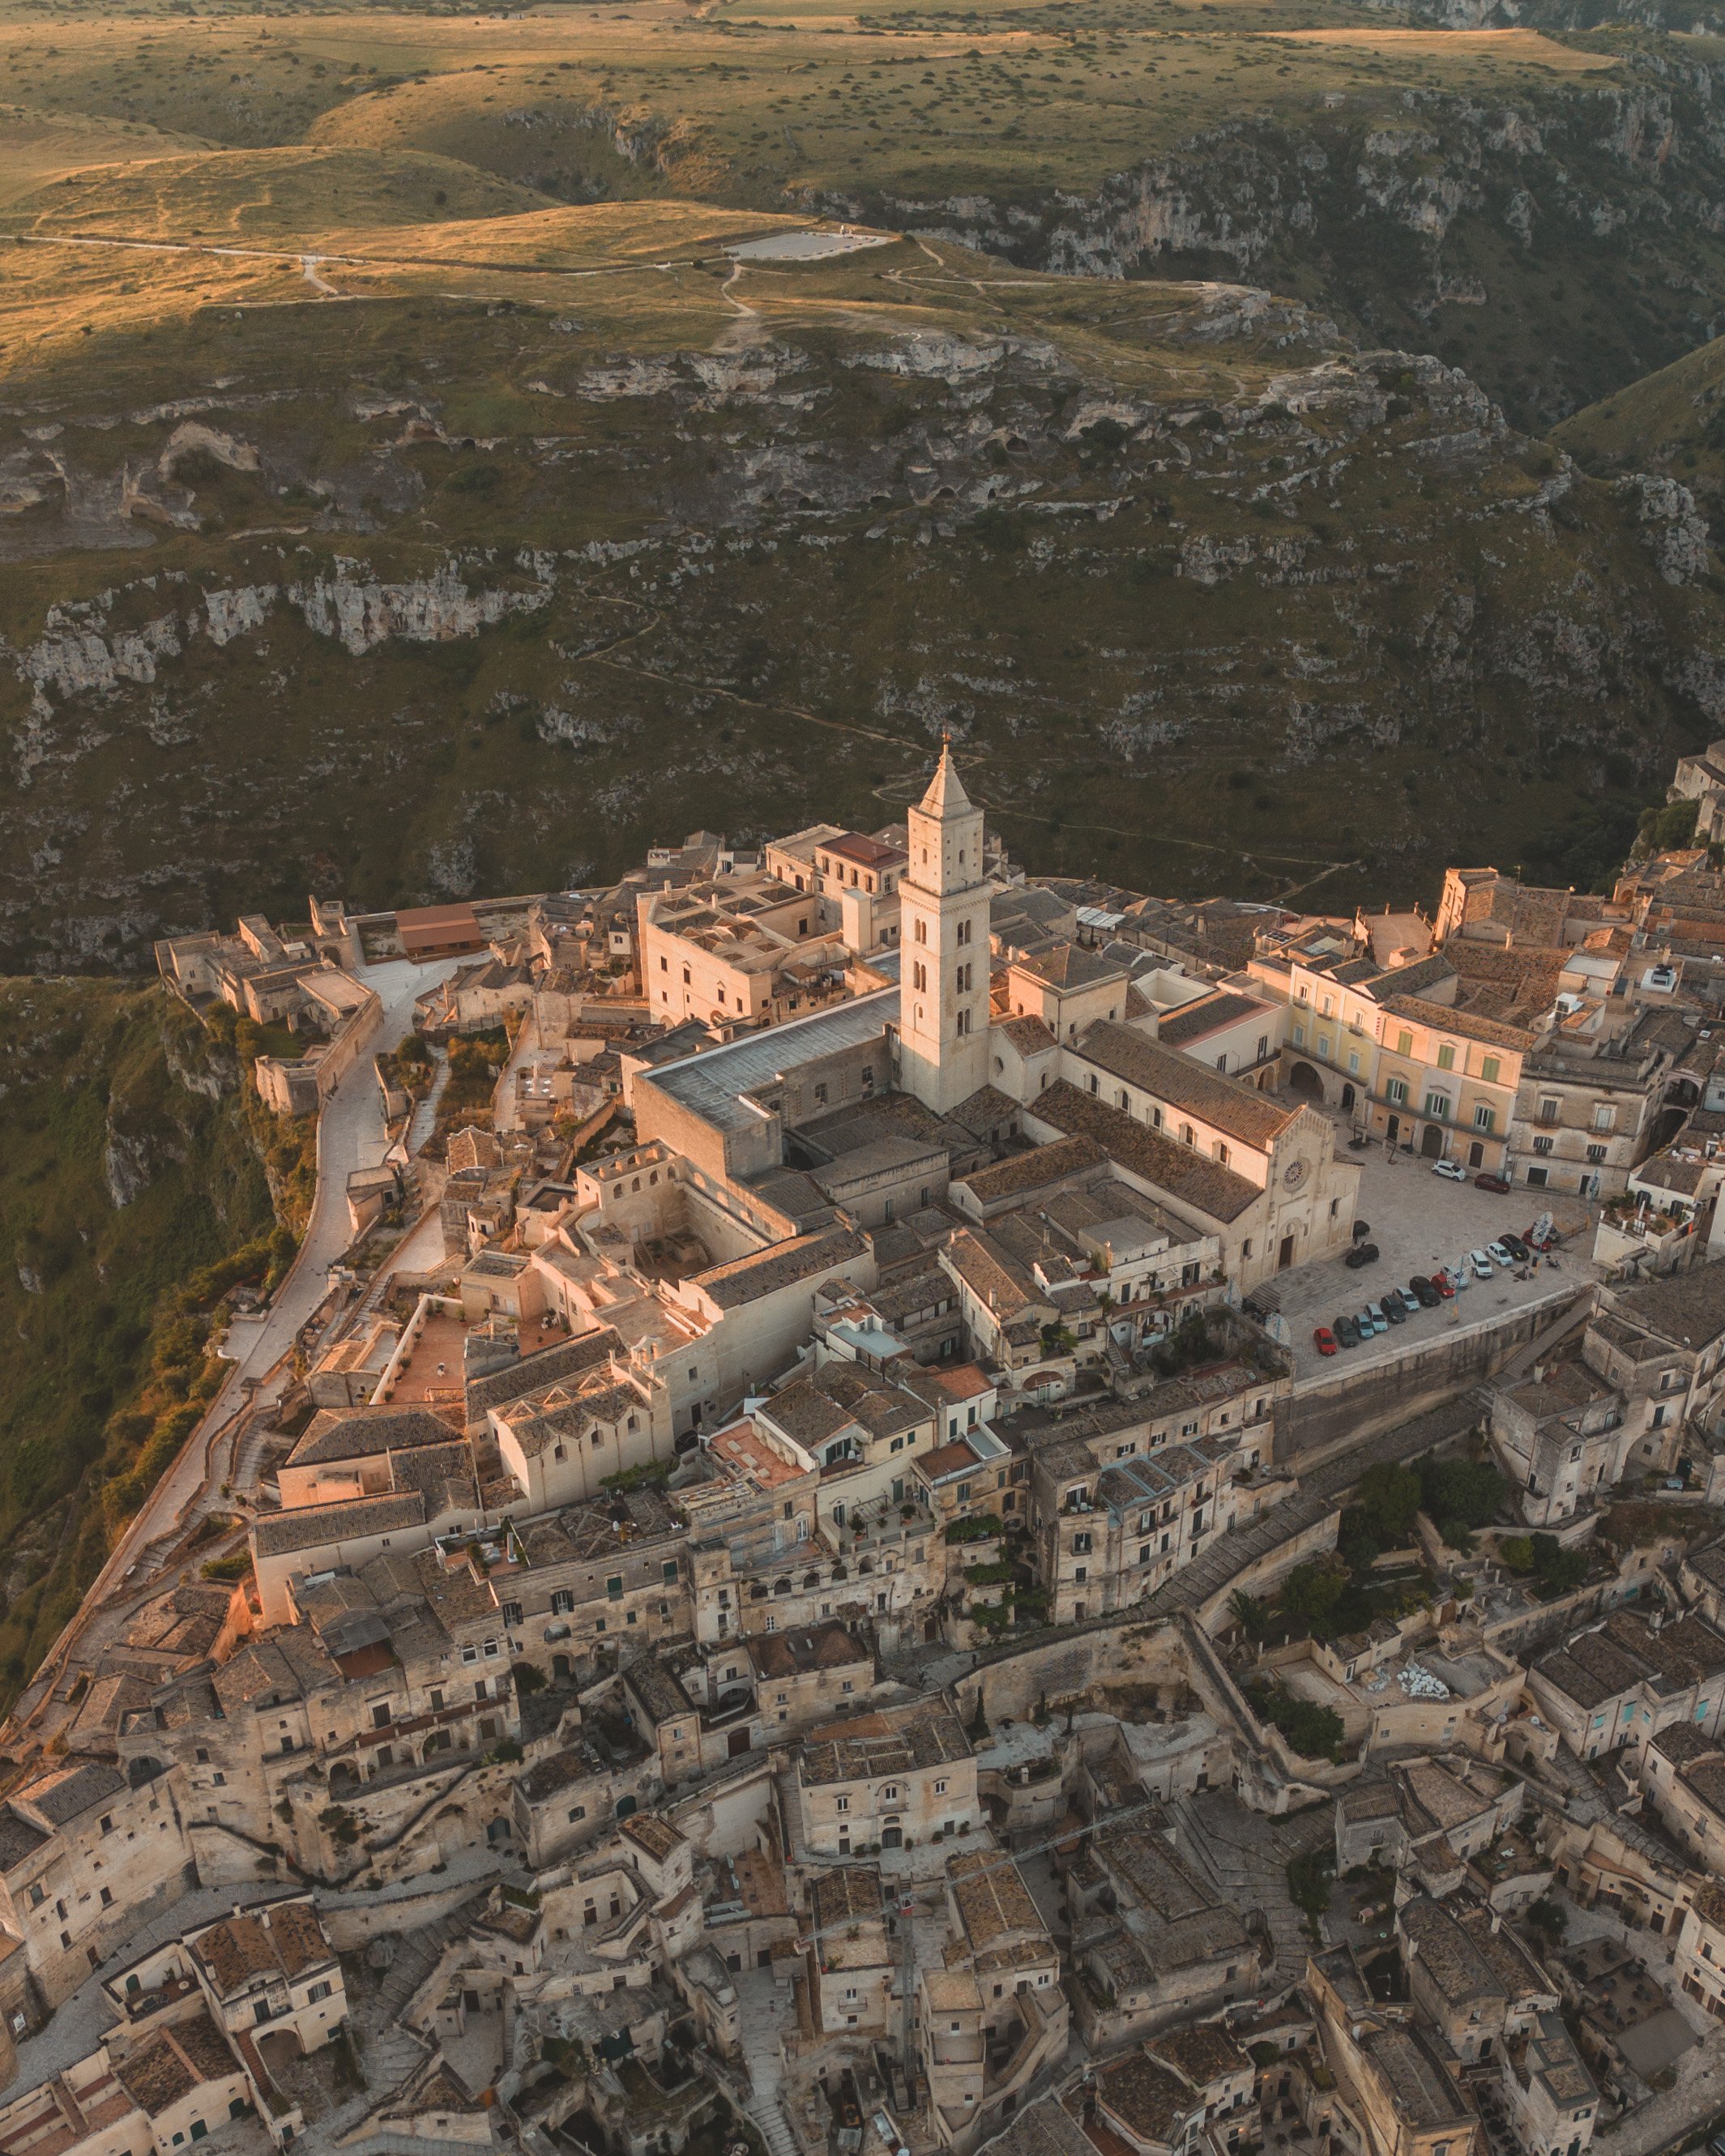
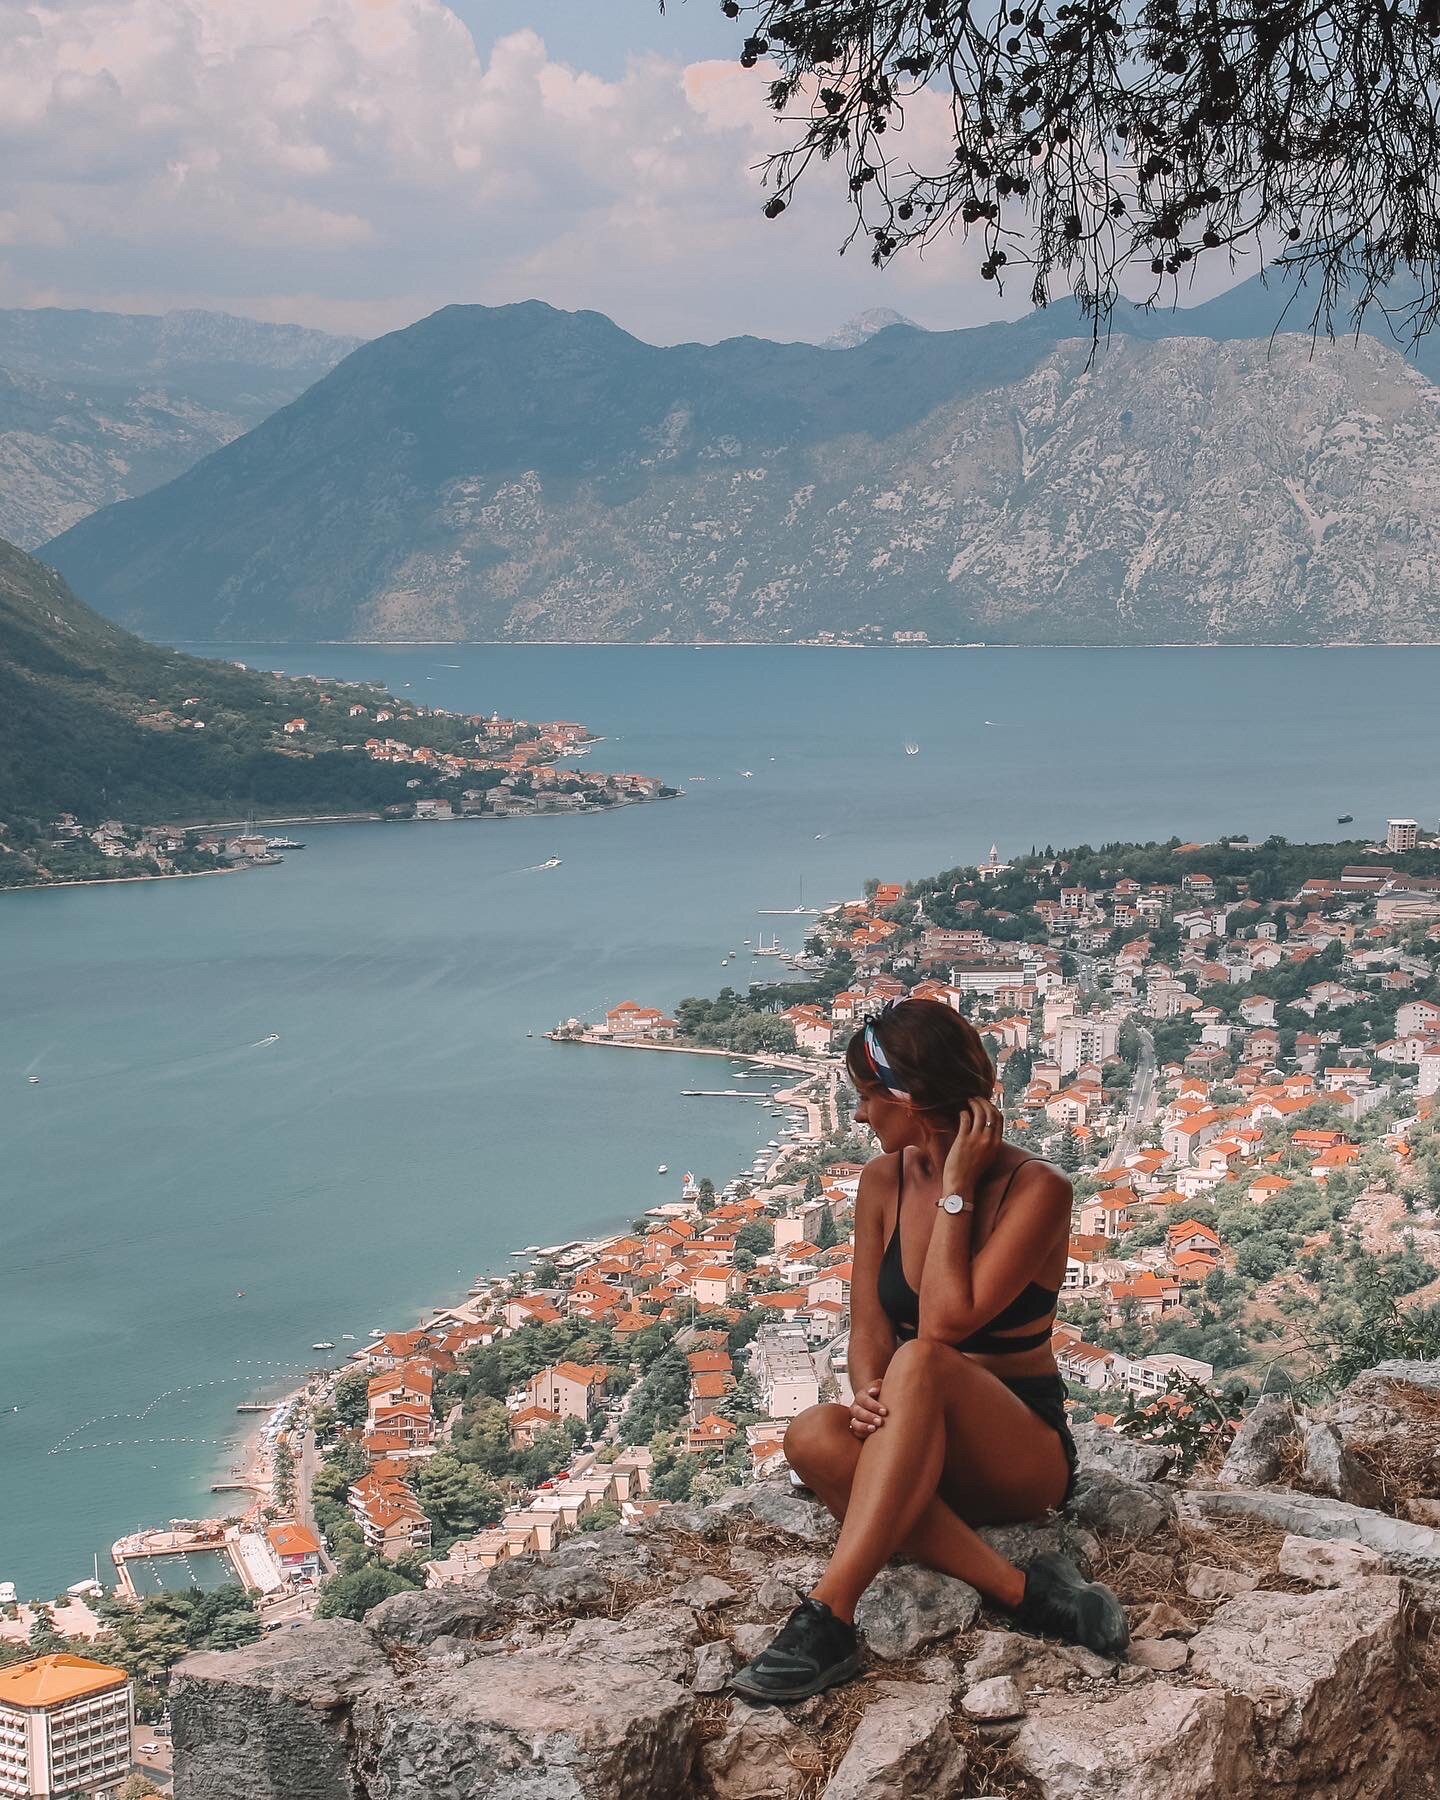
When I was shooting with a Canon, I had four lenses. I was constantly stopping to change them out, and even dropped a few in the process. Since switching to Sony, I’ve relied on two lenses only- the first is the 24-105 mm. This lens has been perfect for 95% of the things I want to shoot. It’s wide enough to take scenic landscape shots and zooms in enough for killer portraits with a beautiful, blurred background. Take these shots from Greece for example:
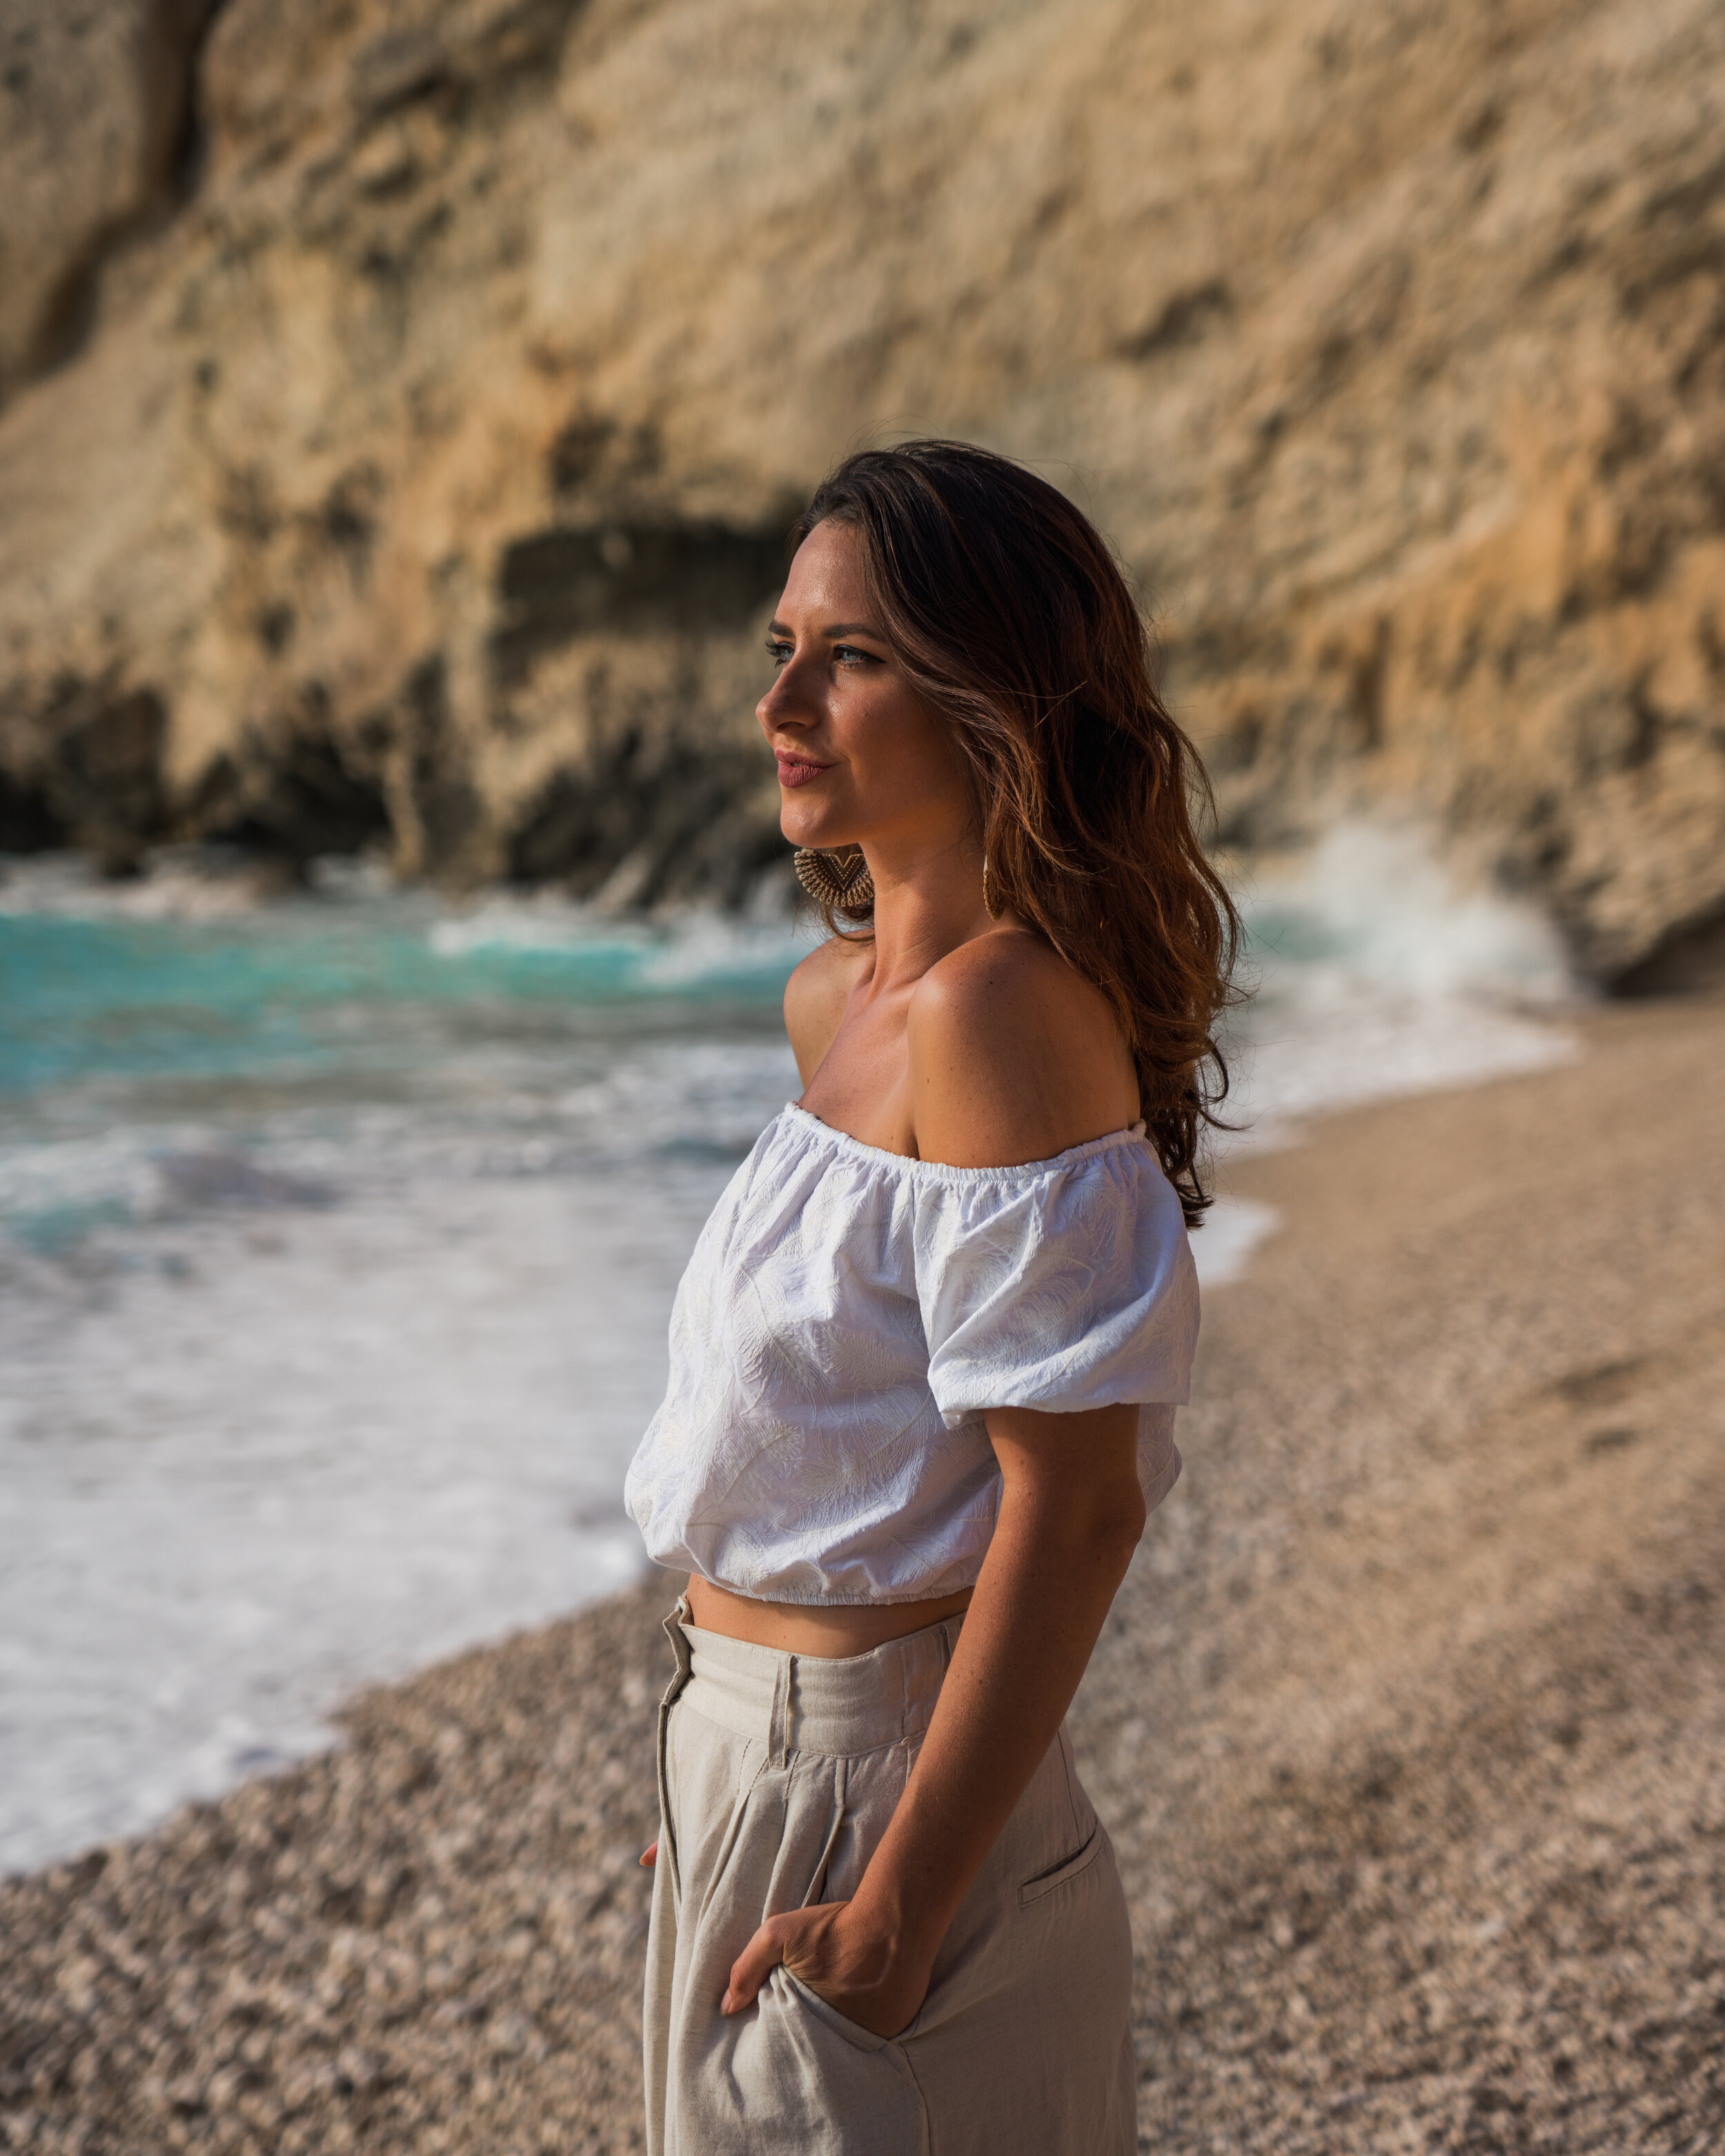

Sony FE 50mm F/1.8 Lens
Cheap, lightweight, and perfect for portraits! The Sony FE 50mm F/1.8 is a fixed lens (meaning it only shoots at 50mm) so if you want to fit more into your frame, you physically need to back up. That said, it’s best for the close ups and blurs out the background behind a subject magnificently. I also tend to pop this one on my camera when I know I want to bring my camera out but don’t want to deal with the weight of the 24-105mm.
DJI Mavic 2 Pro
When I first entered the world of droning, I proceeded with caution. I generally don’t trust myself with expensive things and as a first-time drone operator, I decided I had to buy one whose (inevitable) death wouldn’t rock my bank account and cause too much emotional distress. I chose the DJI Spark as my “training” drone, and was pleasantly surprised when it lasted one whole accident-free year. That is, until I ignored the “return to home” warning, it ran out of battery, and auto-landed somewhere on a steep, inaccessible hillside in Turkey.
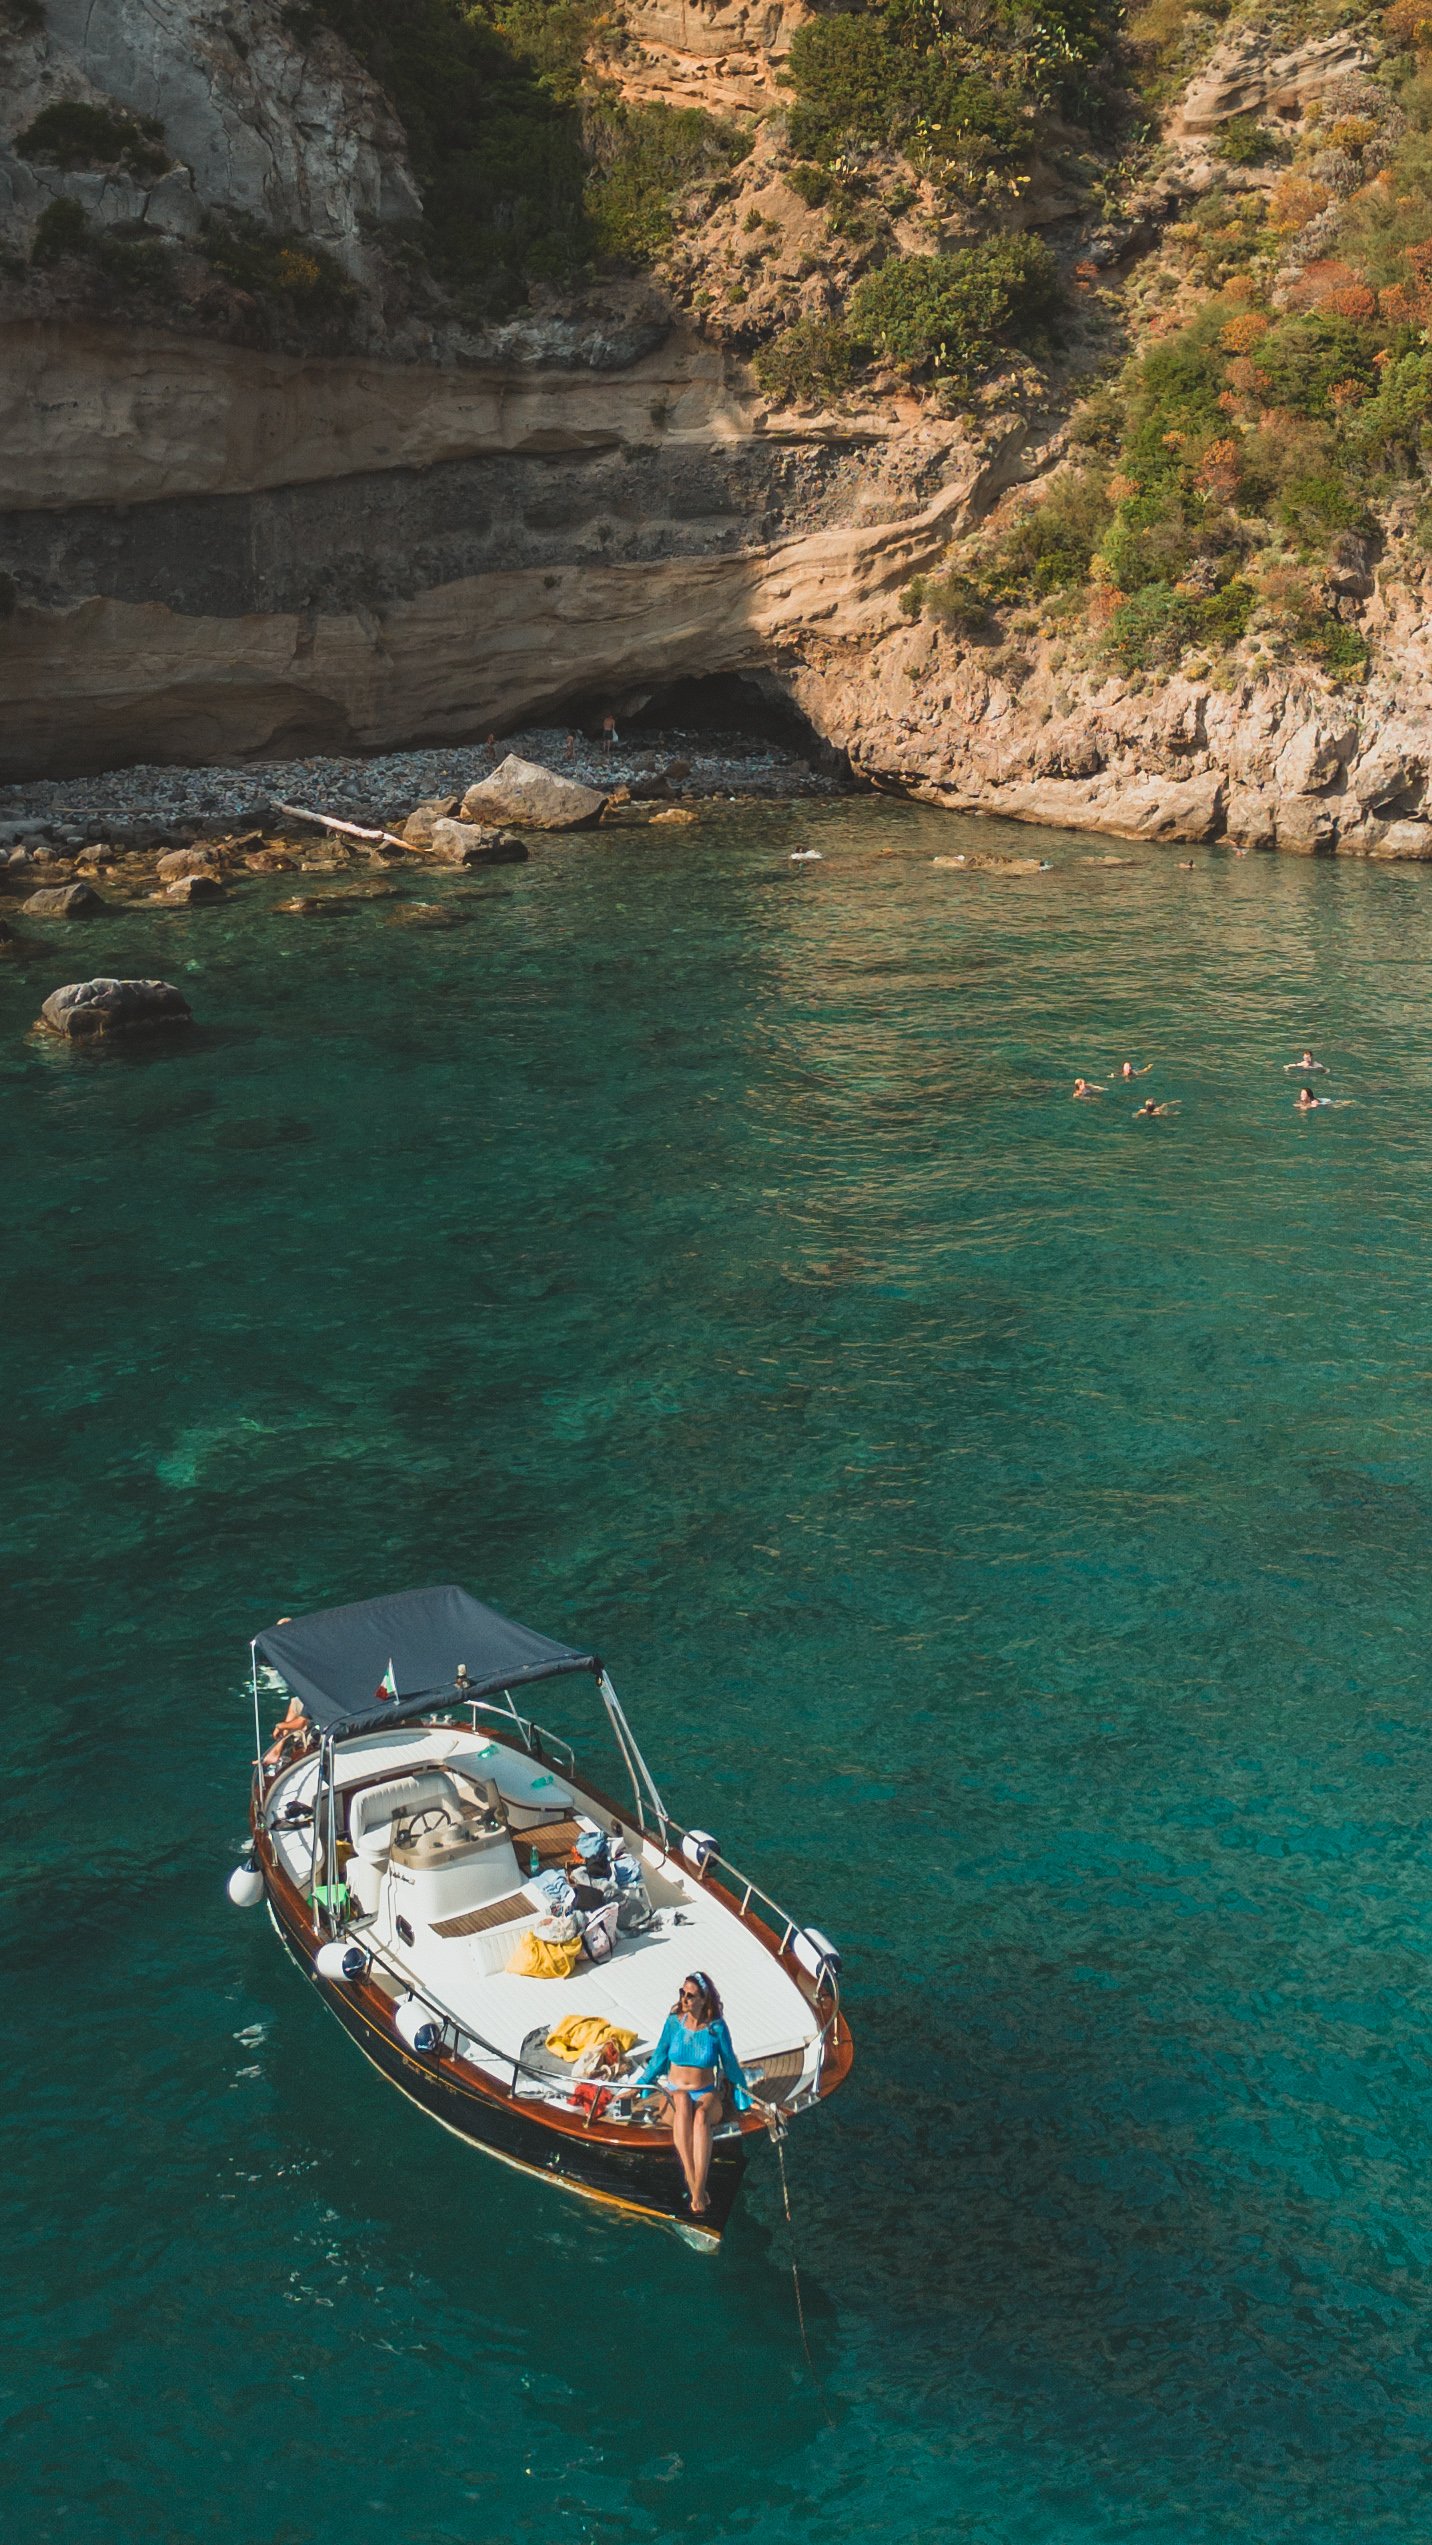
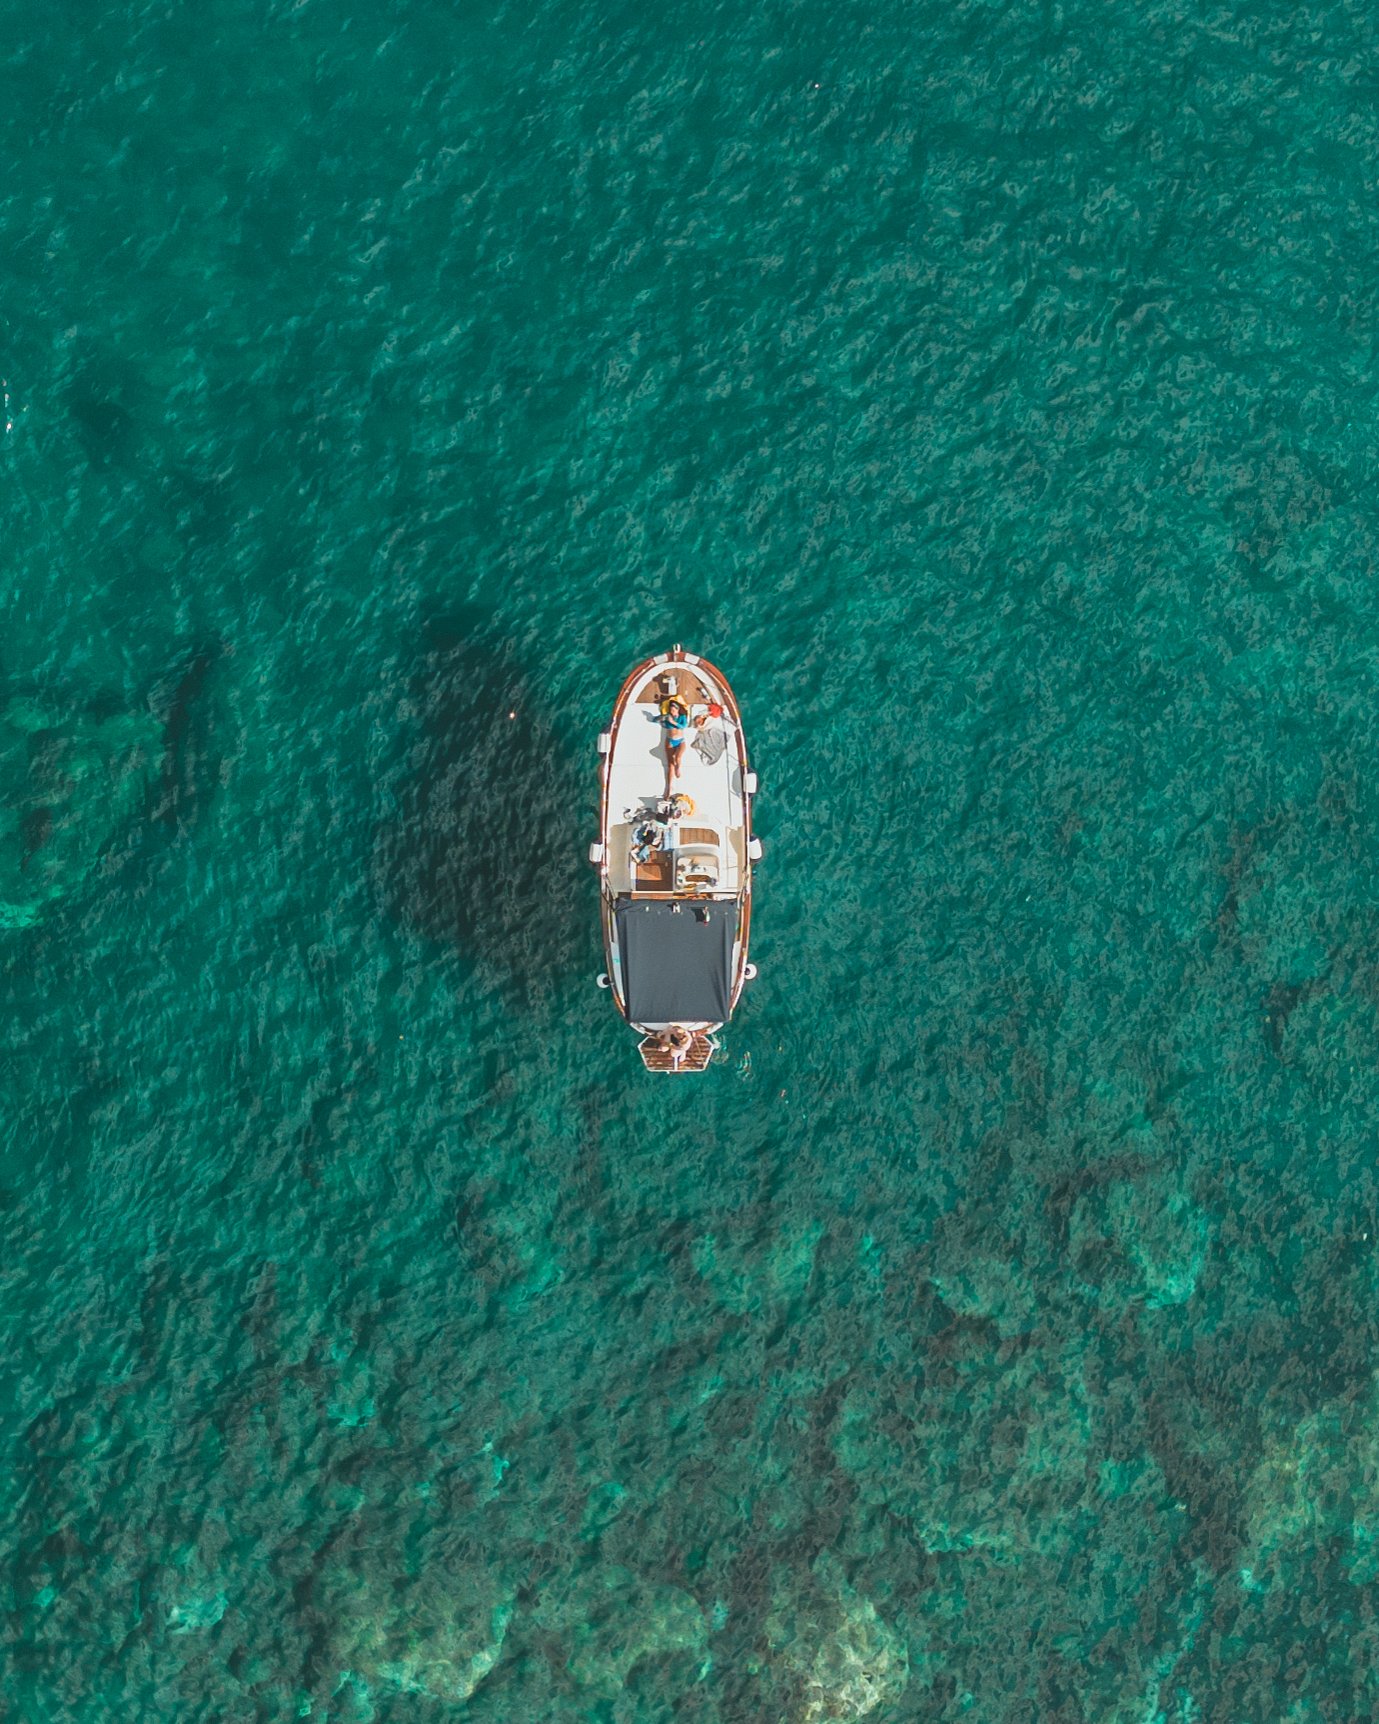
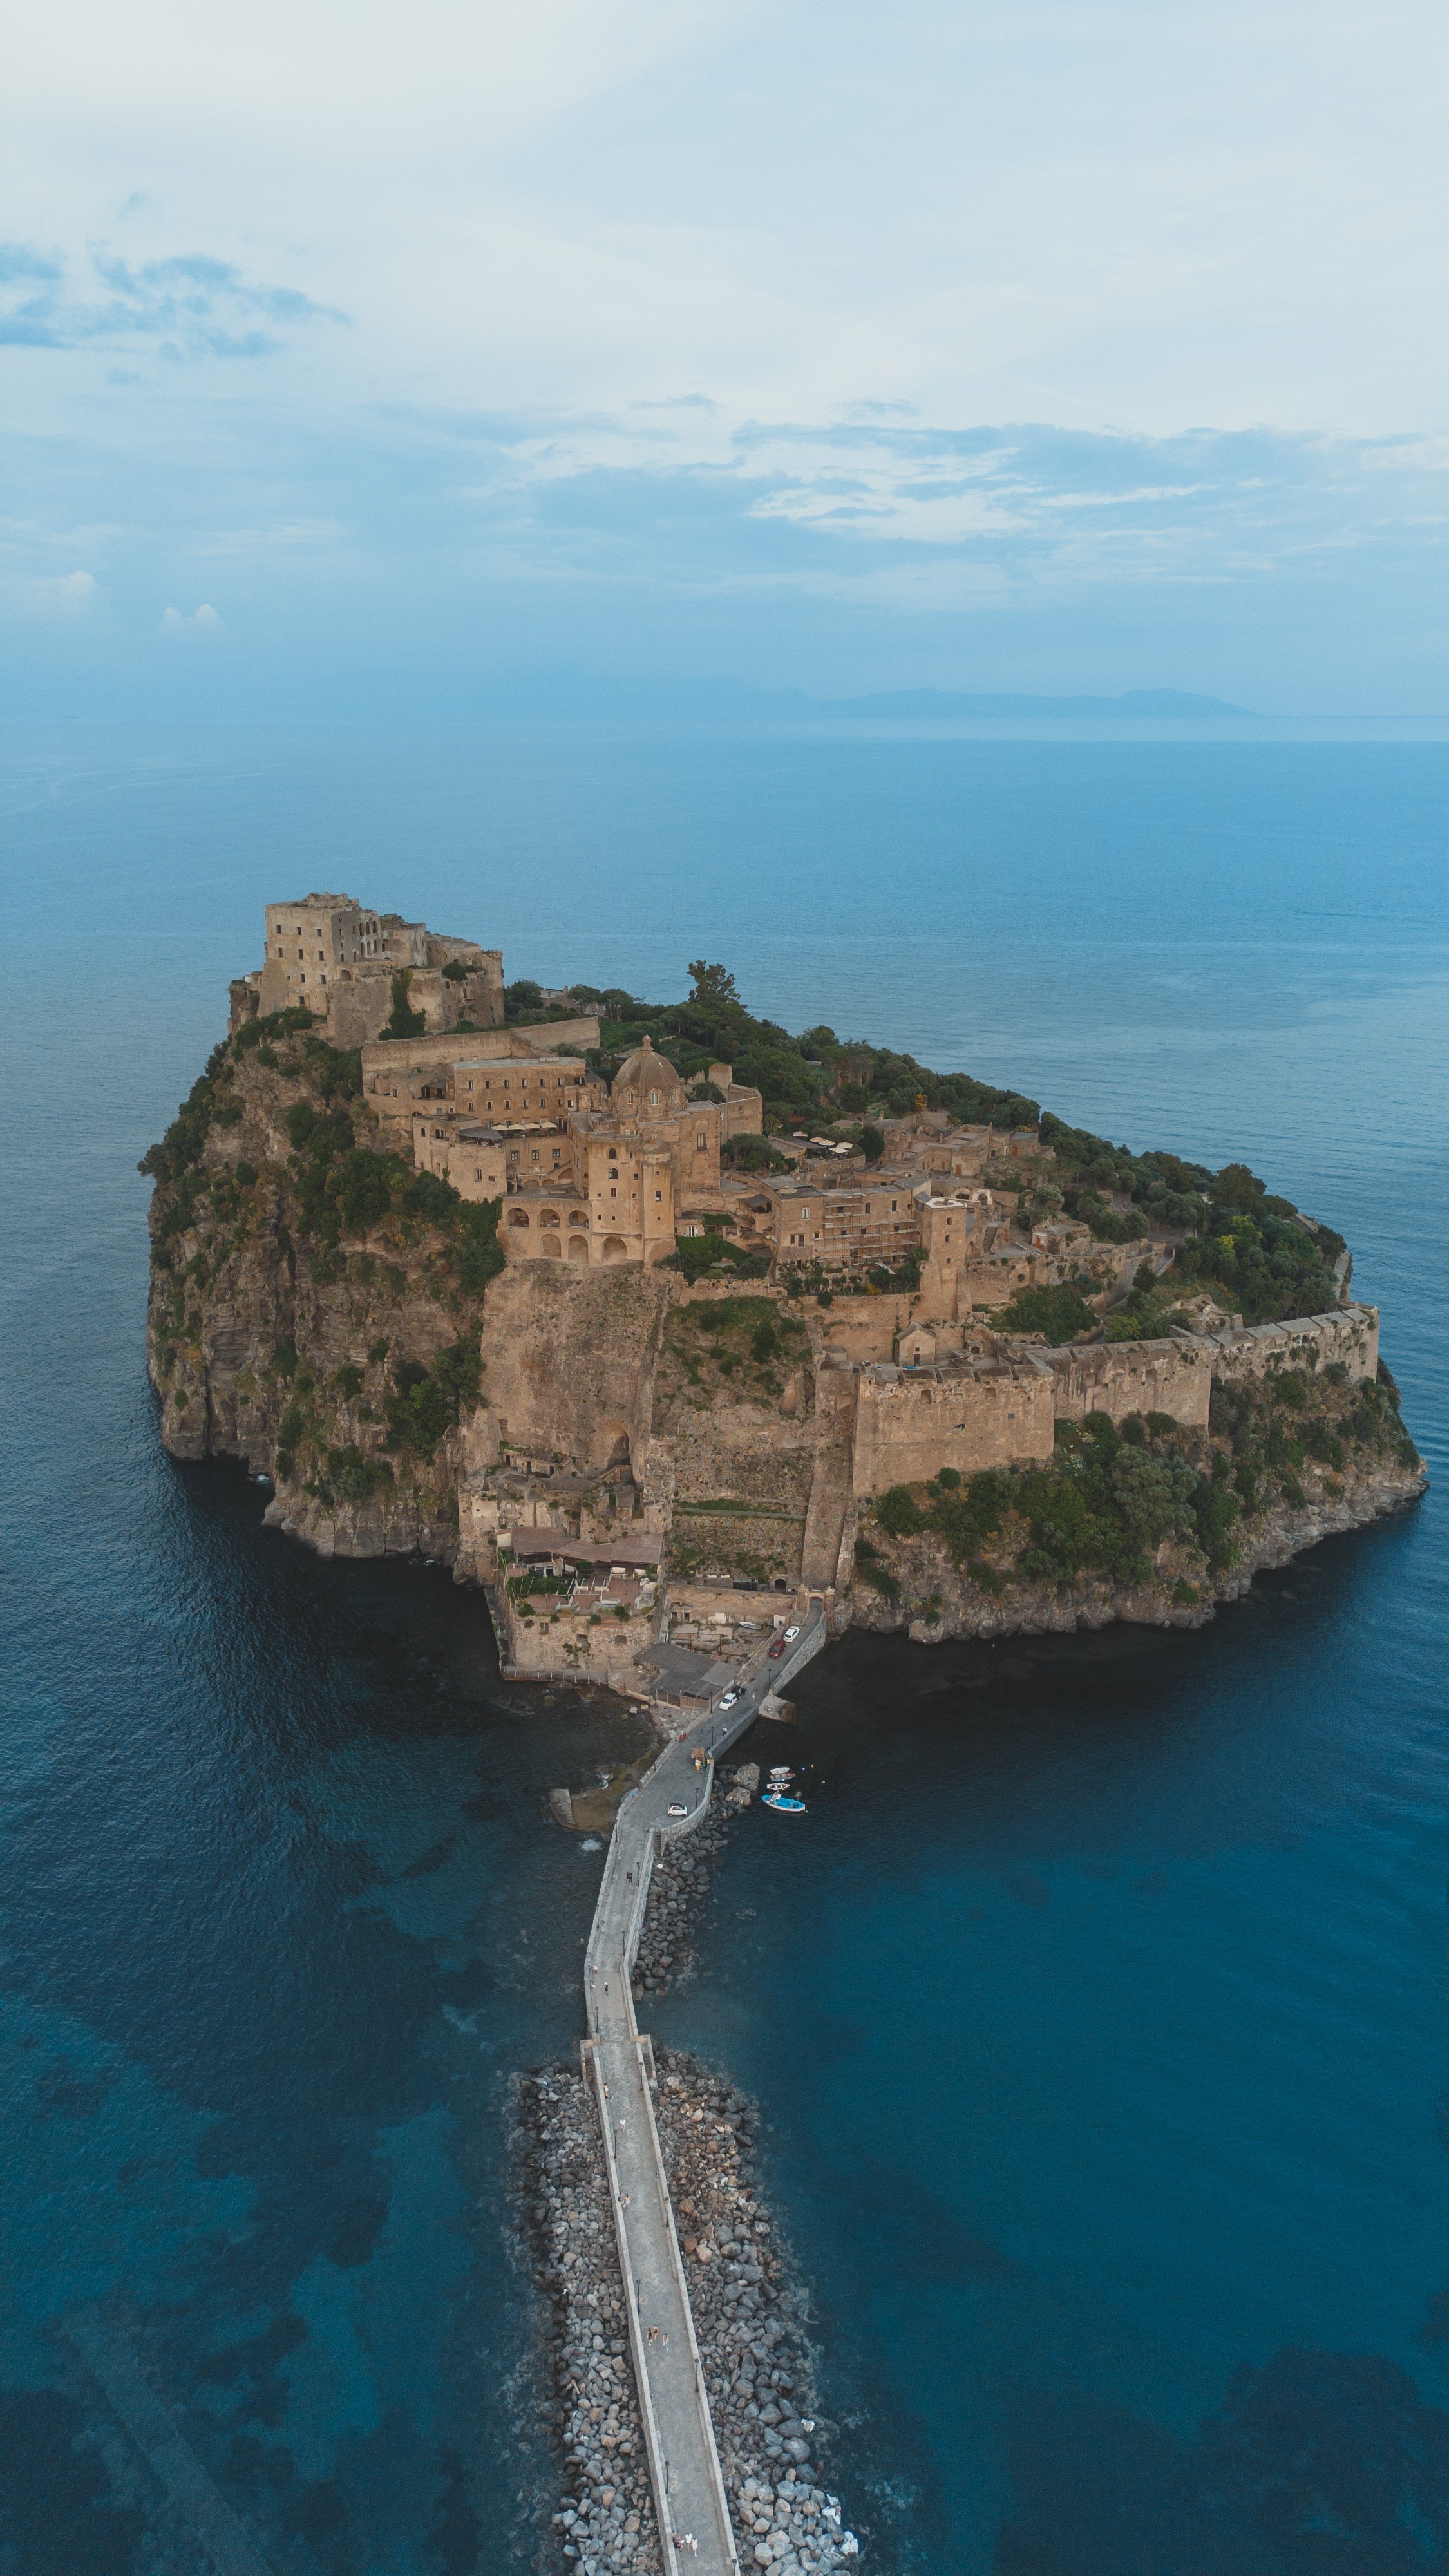
I learned my lesson the hard way, and with a year of flying experience under my belt, went for an upgrade when I replaced my Spark. This time, I wanted better quality photos and videos and longer battery life. So the DJI Mavic 2 Pro joined the family. With a weight just under 2 lbs, a flight time of almost a half an hour, and a foldable body, it was a pretty solid option for my on-the-go lifestyle. I’m happy to say that my Mavic is still alive and well, and has enjoyed flights in some pretty incredible countries including Greece, Italy, and England, to name a few.


DJI Mini 3
While the Mavic is still in perfect working order, I recently added the DJI Mini 3 to the mix. Since travel and portability are always at the forefront of my mind, this drone is my new go-to for travel adventures. The drone weighs in at only 249 grams and takes up minimal space in my luggage. It’s great for beginners and the smart controller has a built-in screen so you don’t need to connect a phone to use it. Best of all, the camera shoots 4k and can rotate vertically - perfect for Instagram reels.
iPhone 14 Pro
It’s very rare that you’ll see me posting an image taken on my iPhone, but I’m pretty active on my Instagram stories and most of what you see there has been shot on my phone. I love using the iPhone 14 Pro’s wide angle for video tours of my Airbnbs or other pretty spaces, portrait mode for shots that could easily be mistaken for DSLR quality, and the time-lapse feature for busy city scenes or a sky of moving clouds.
My Tripods
Manfrotto Compact Action Aluminum 5-Section Tripod
“Who takes your photos!?” If I’m in one of my photos, it was either taken by a travel companion or my trusty Manfrotto tripod and a remote. The Sony A7RIII is equipped with WiFi, which I can connect to my phone via the Imaging Edge Mobile app. This app allows me to use my phone as a remote and even see a live preview of the shot. I put it on a timer and use interval shooting, which gives me enough time to press the shutter and hide my phone out of view. Some examples of shots I’ve taken with my tripod:
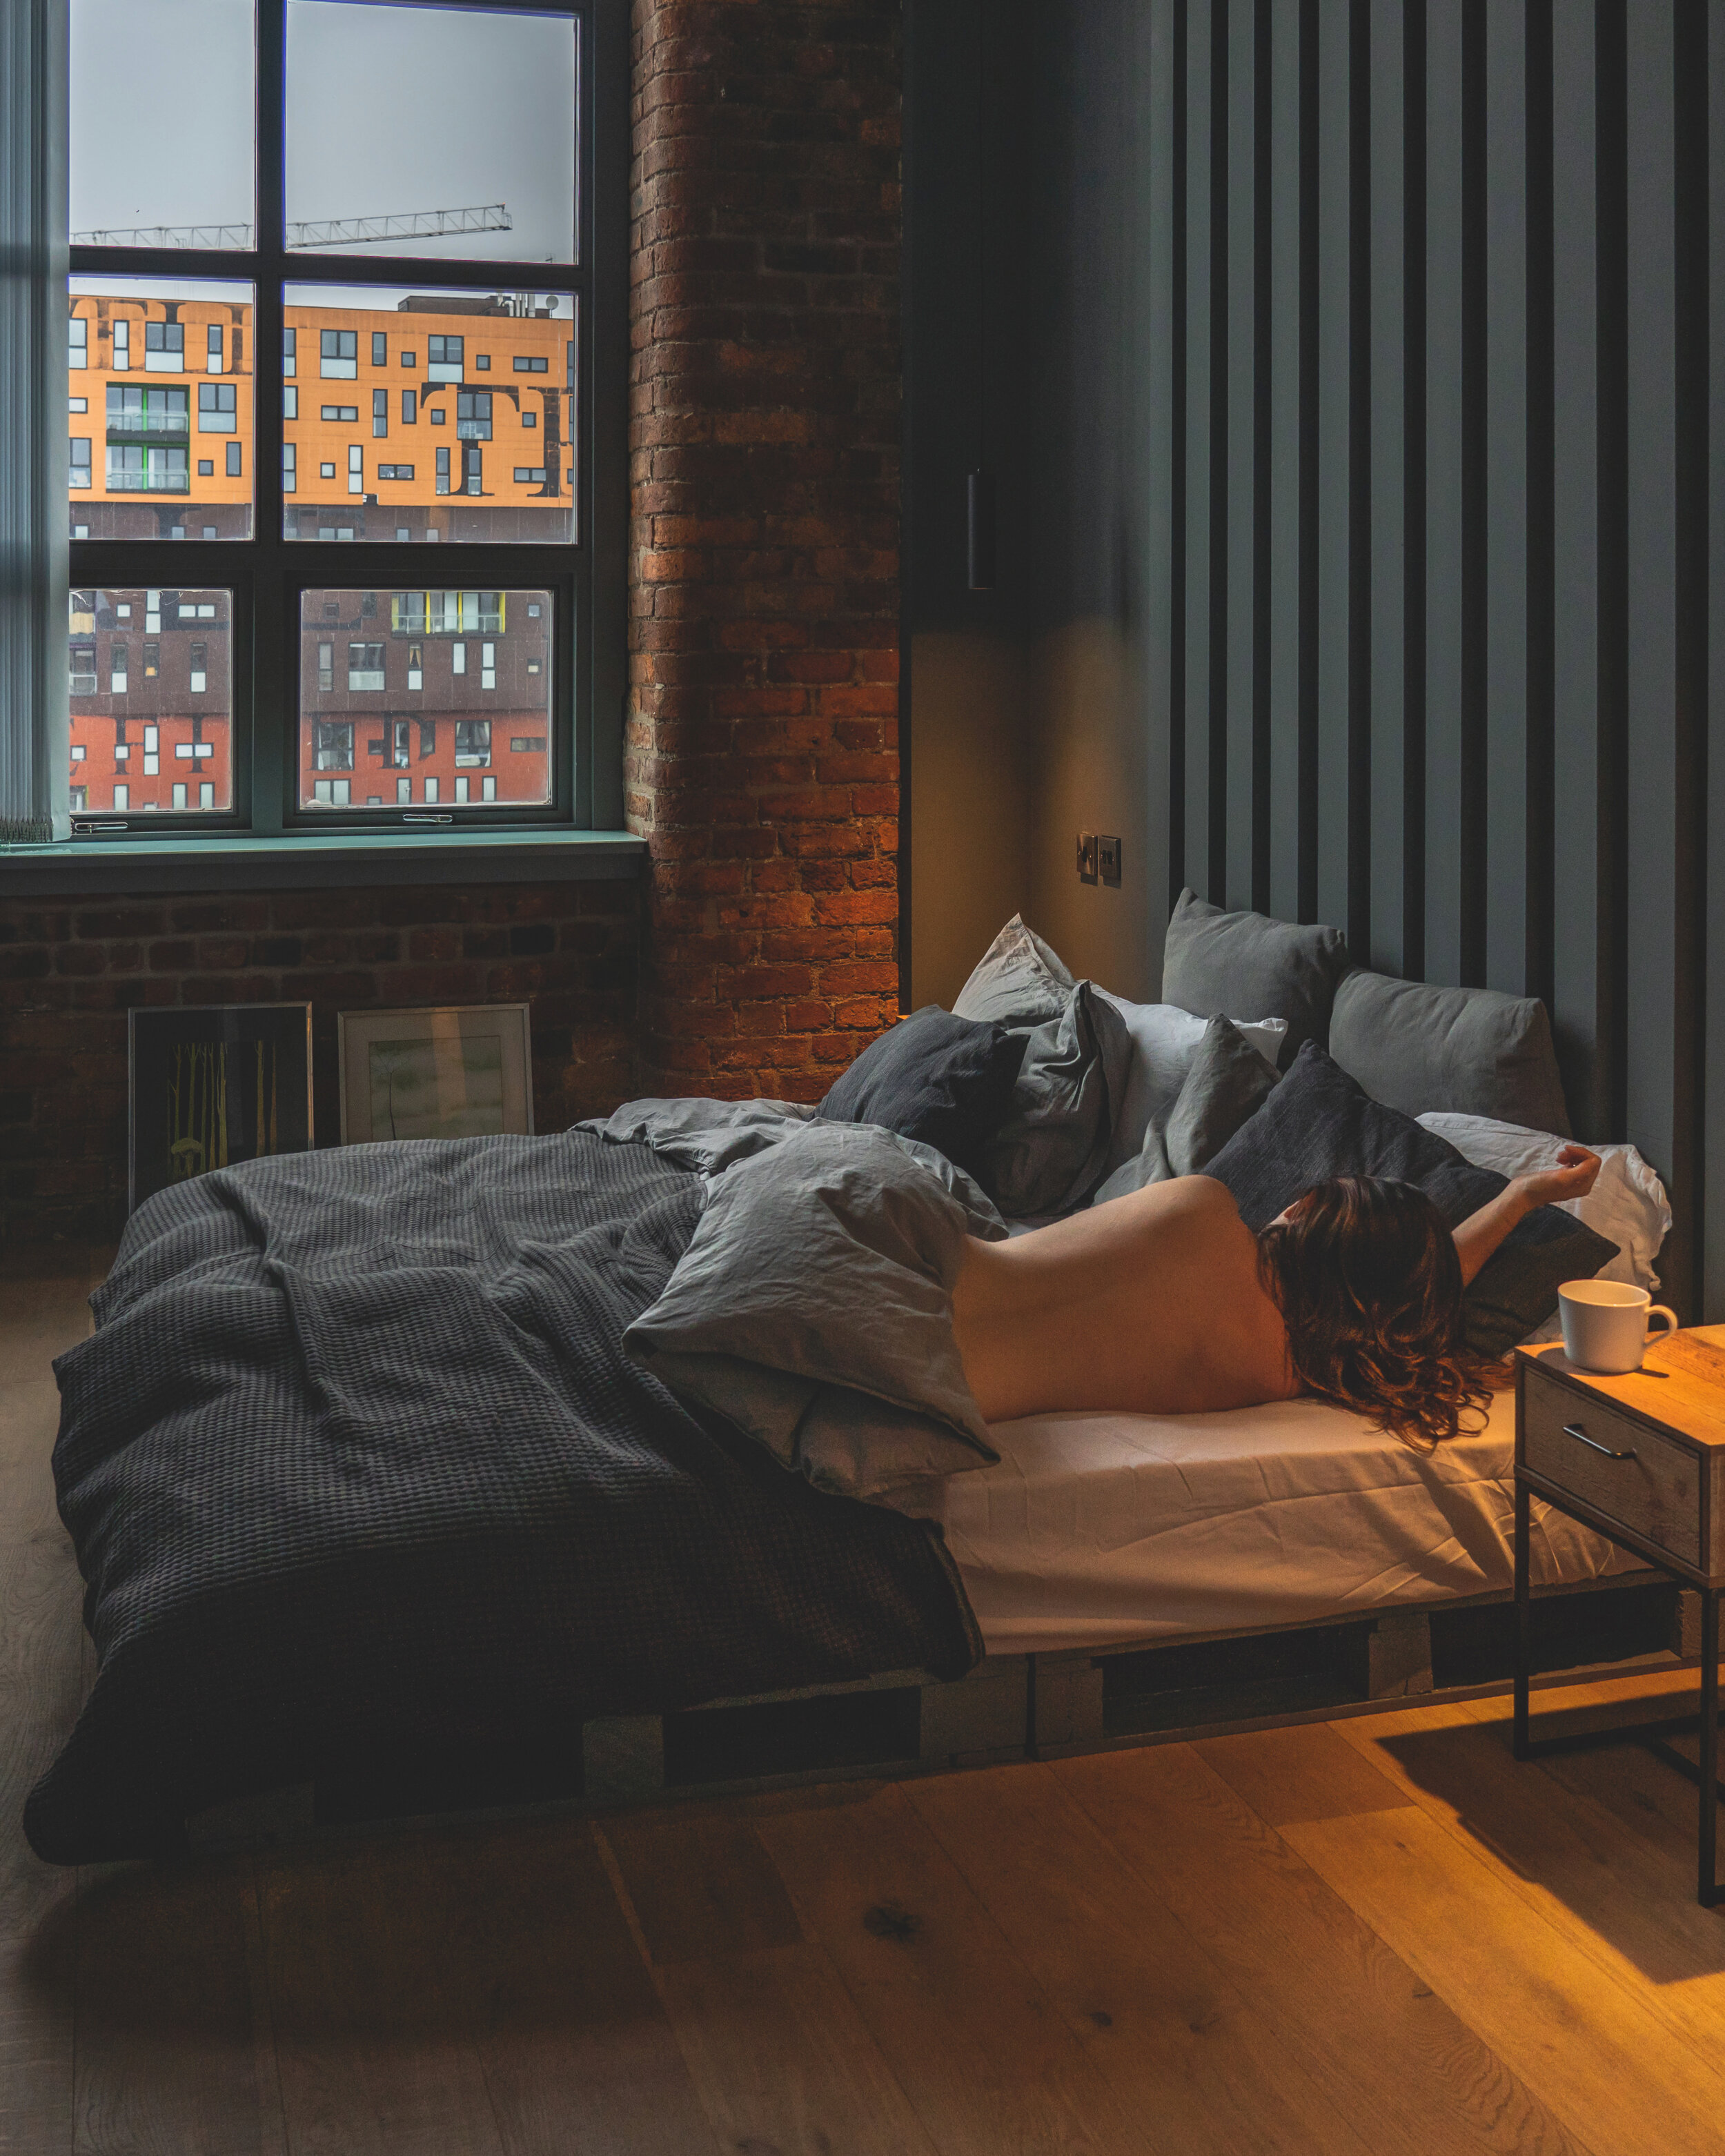
And here’s my Instagram boyfriend himself:

I can’t find my exact model on Amazon anymore, however this compact travel Manfrotto looks like a better, lighter find!
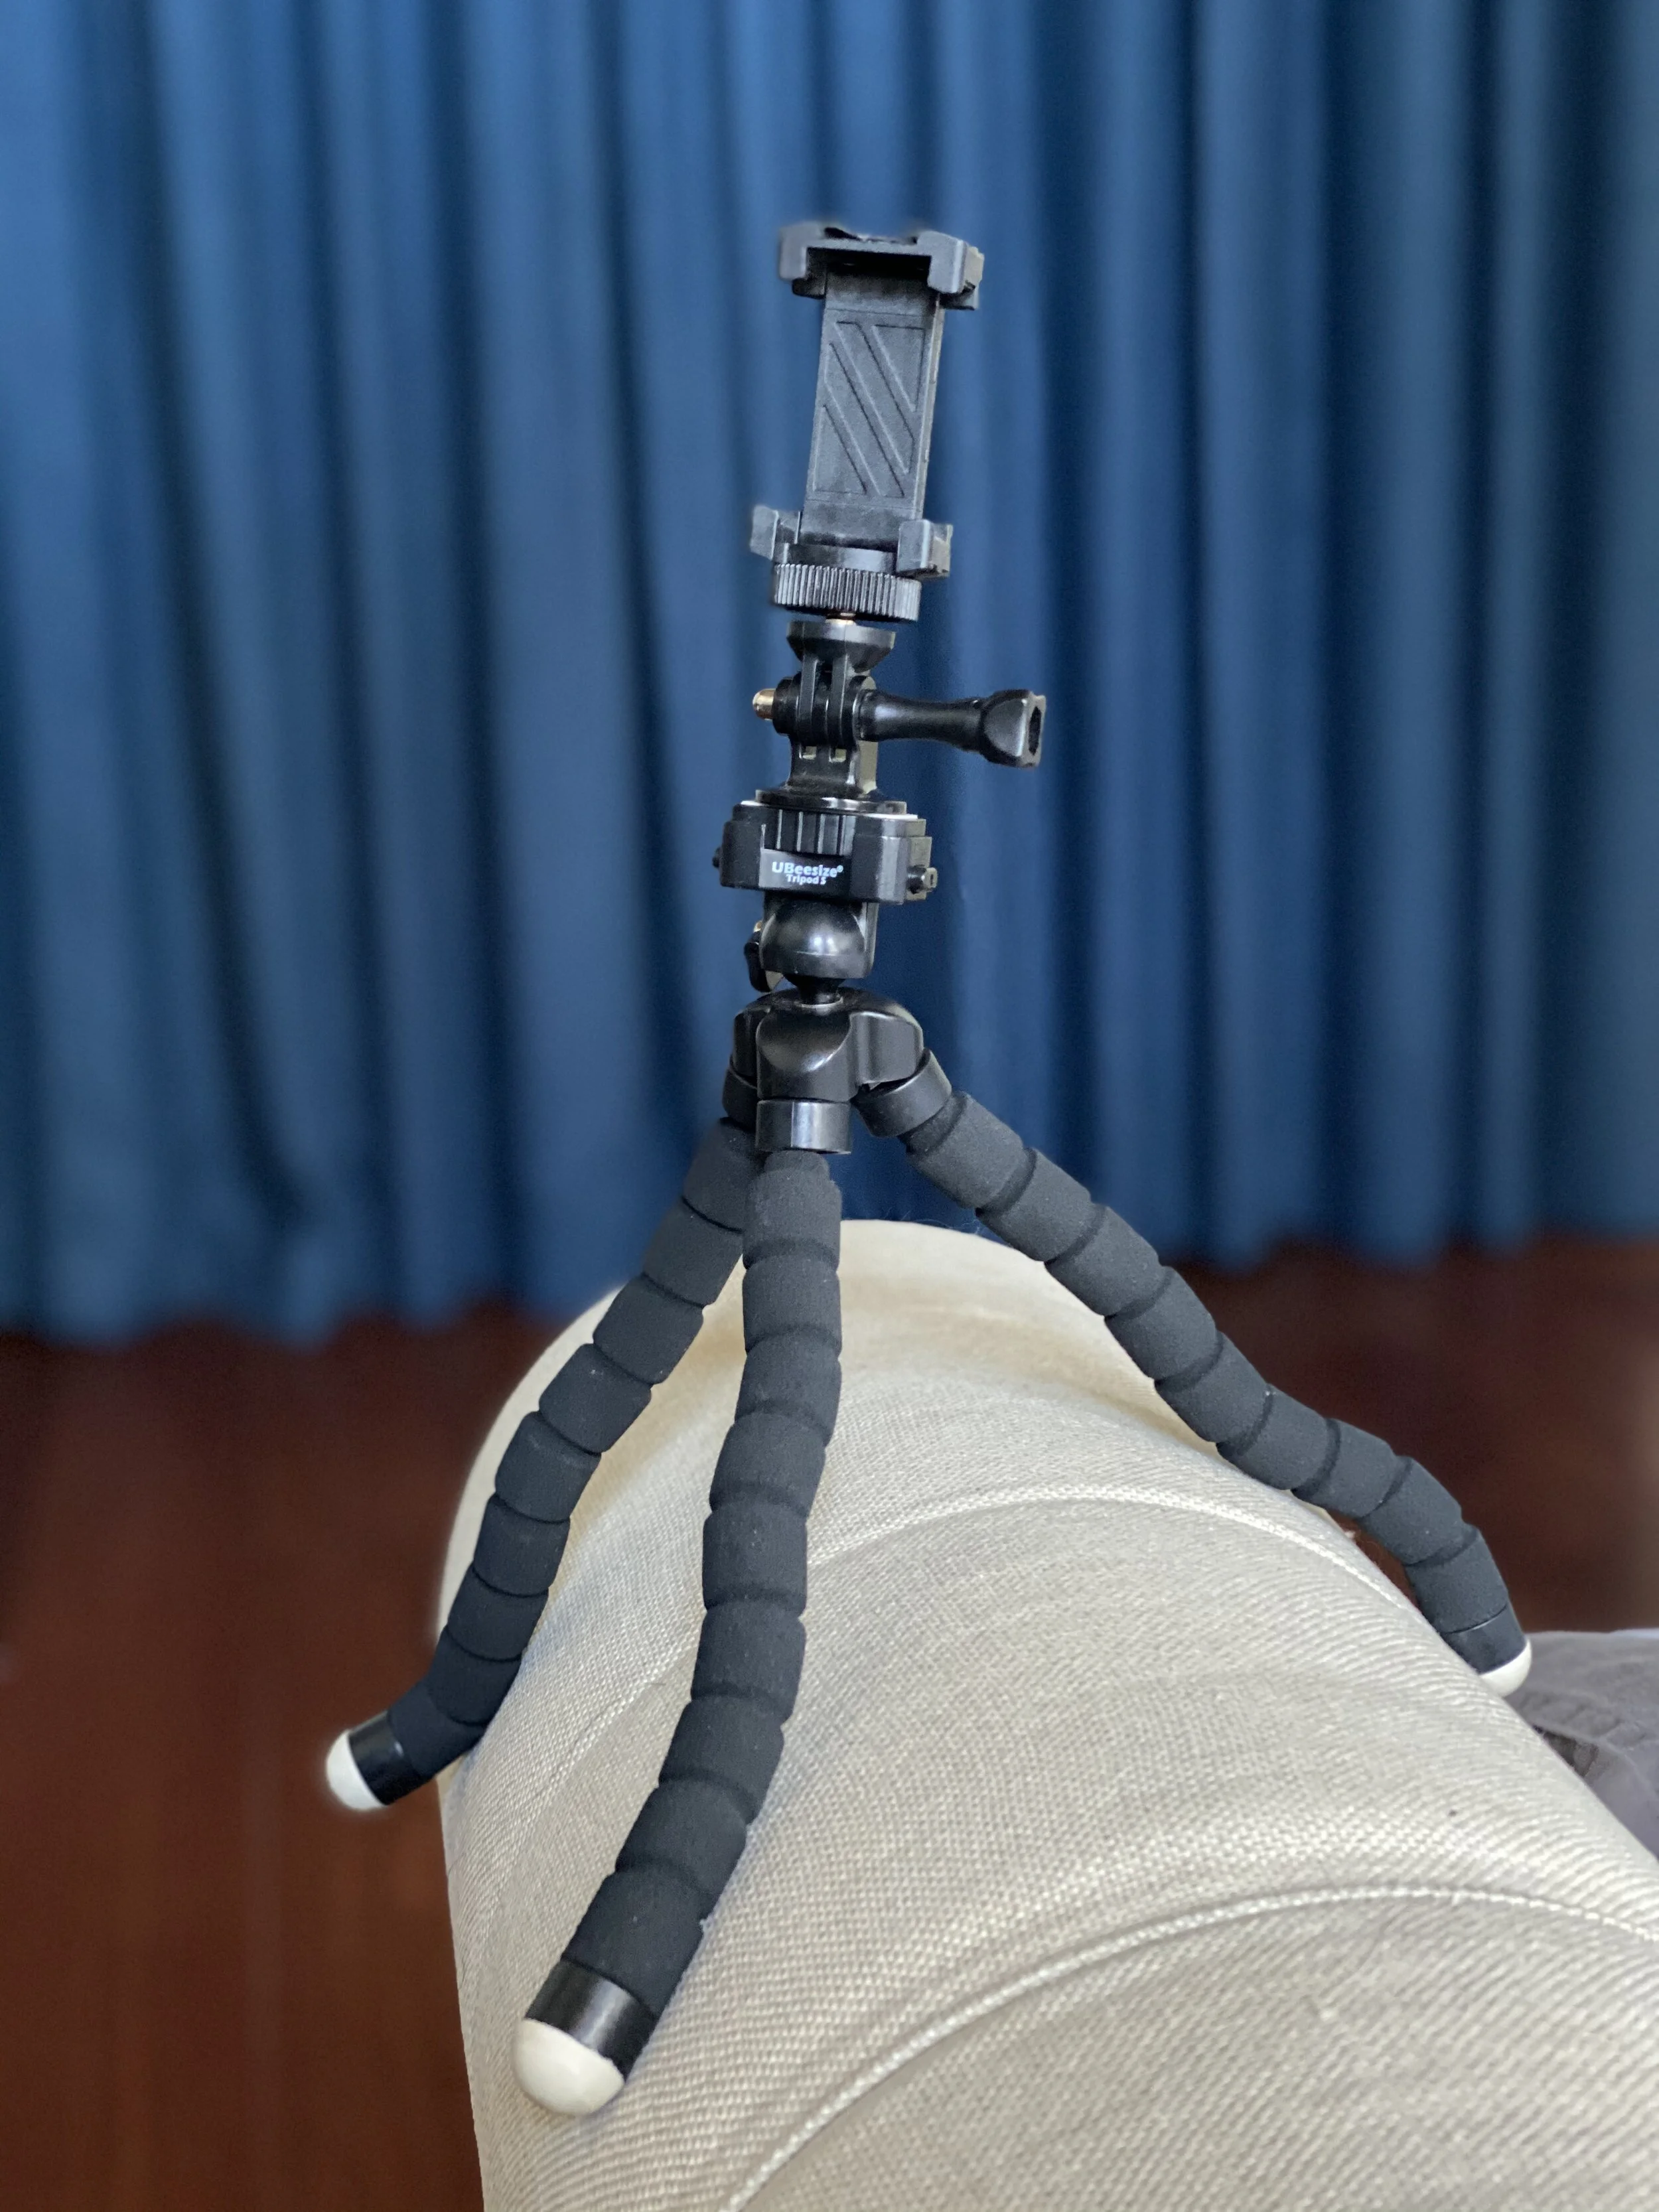
UBeesize Tripod
Some days I don’t feel like hauling my compact yet slightly heavy tripod around. If I want to take some stable time-lapses or videos with me in it for my Instagram stories, this little guy does the trick. The flexible legs are great for folding it up in a bag or wrapping it around solid objects for a better shot. The product description claims that it can support a DSLR camera, but I’m not convinced that it’s quite sturdy enough for that.
Ulanzi Phone Holder
This little accessory is a game changer! It works as a holder for your phone and can be fixed on your camera’s hot shoe mount. This is a great way to multi-task and capture BTS footage while you’re shooting photos.

MY BACKPACK
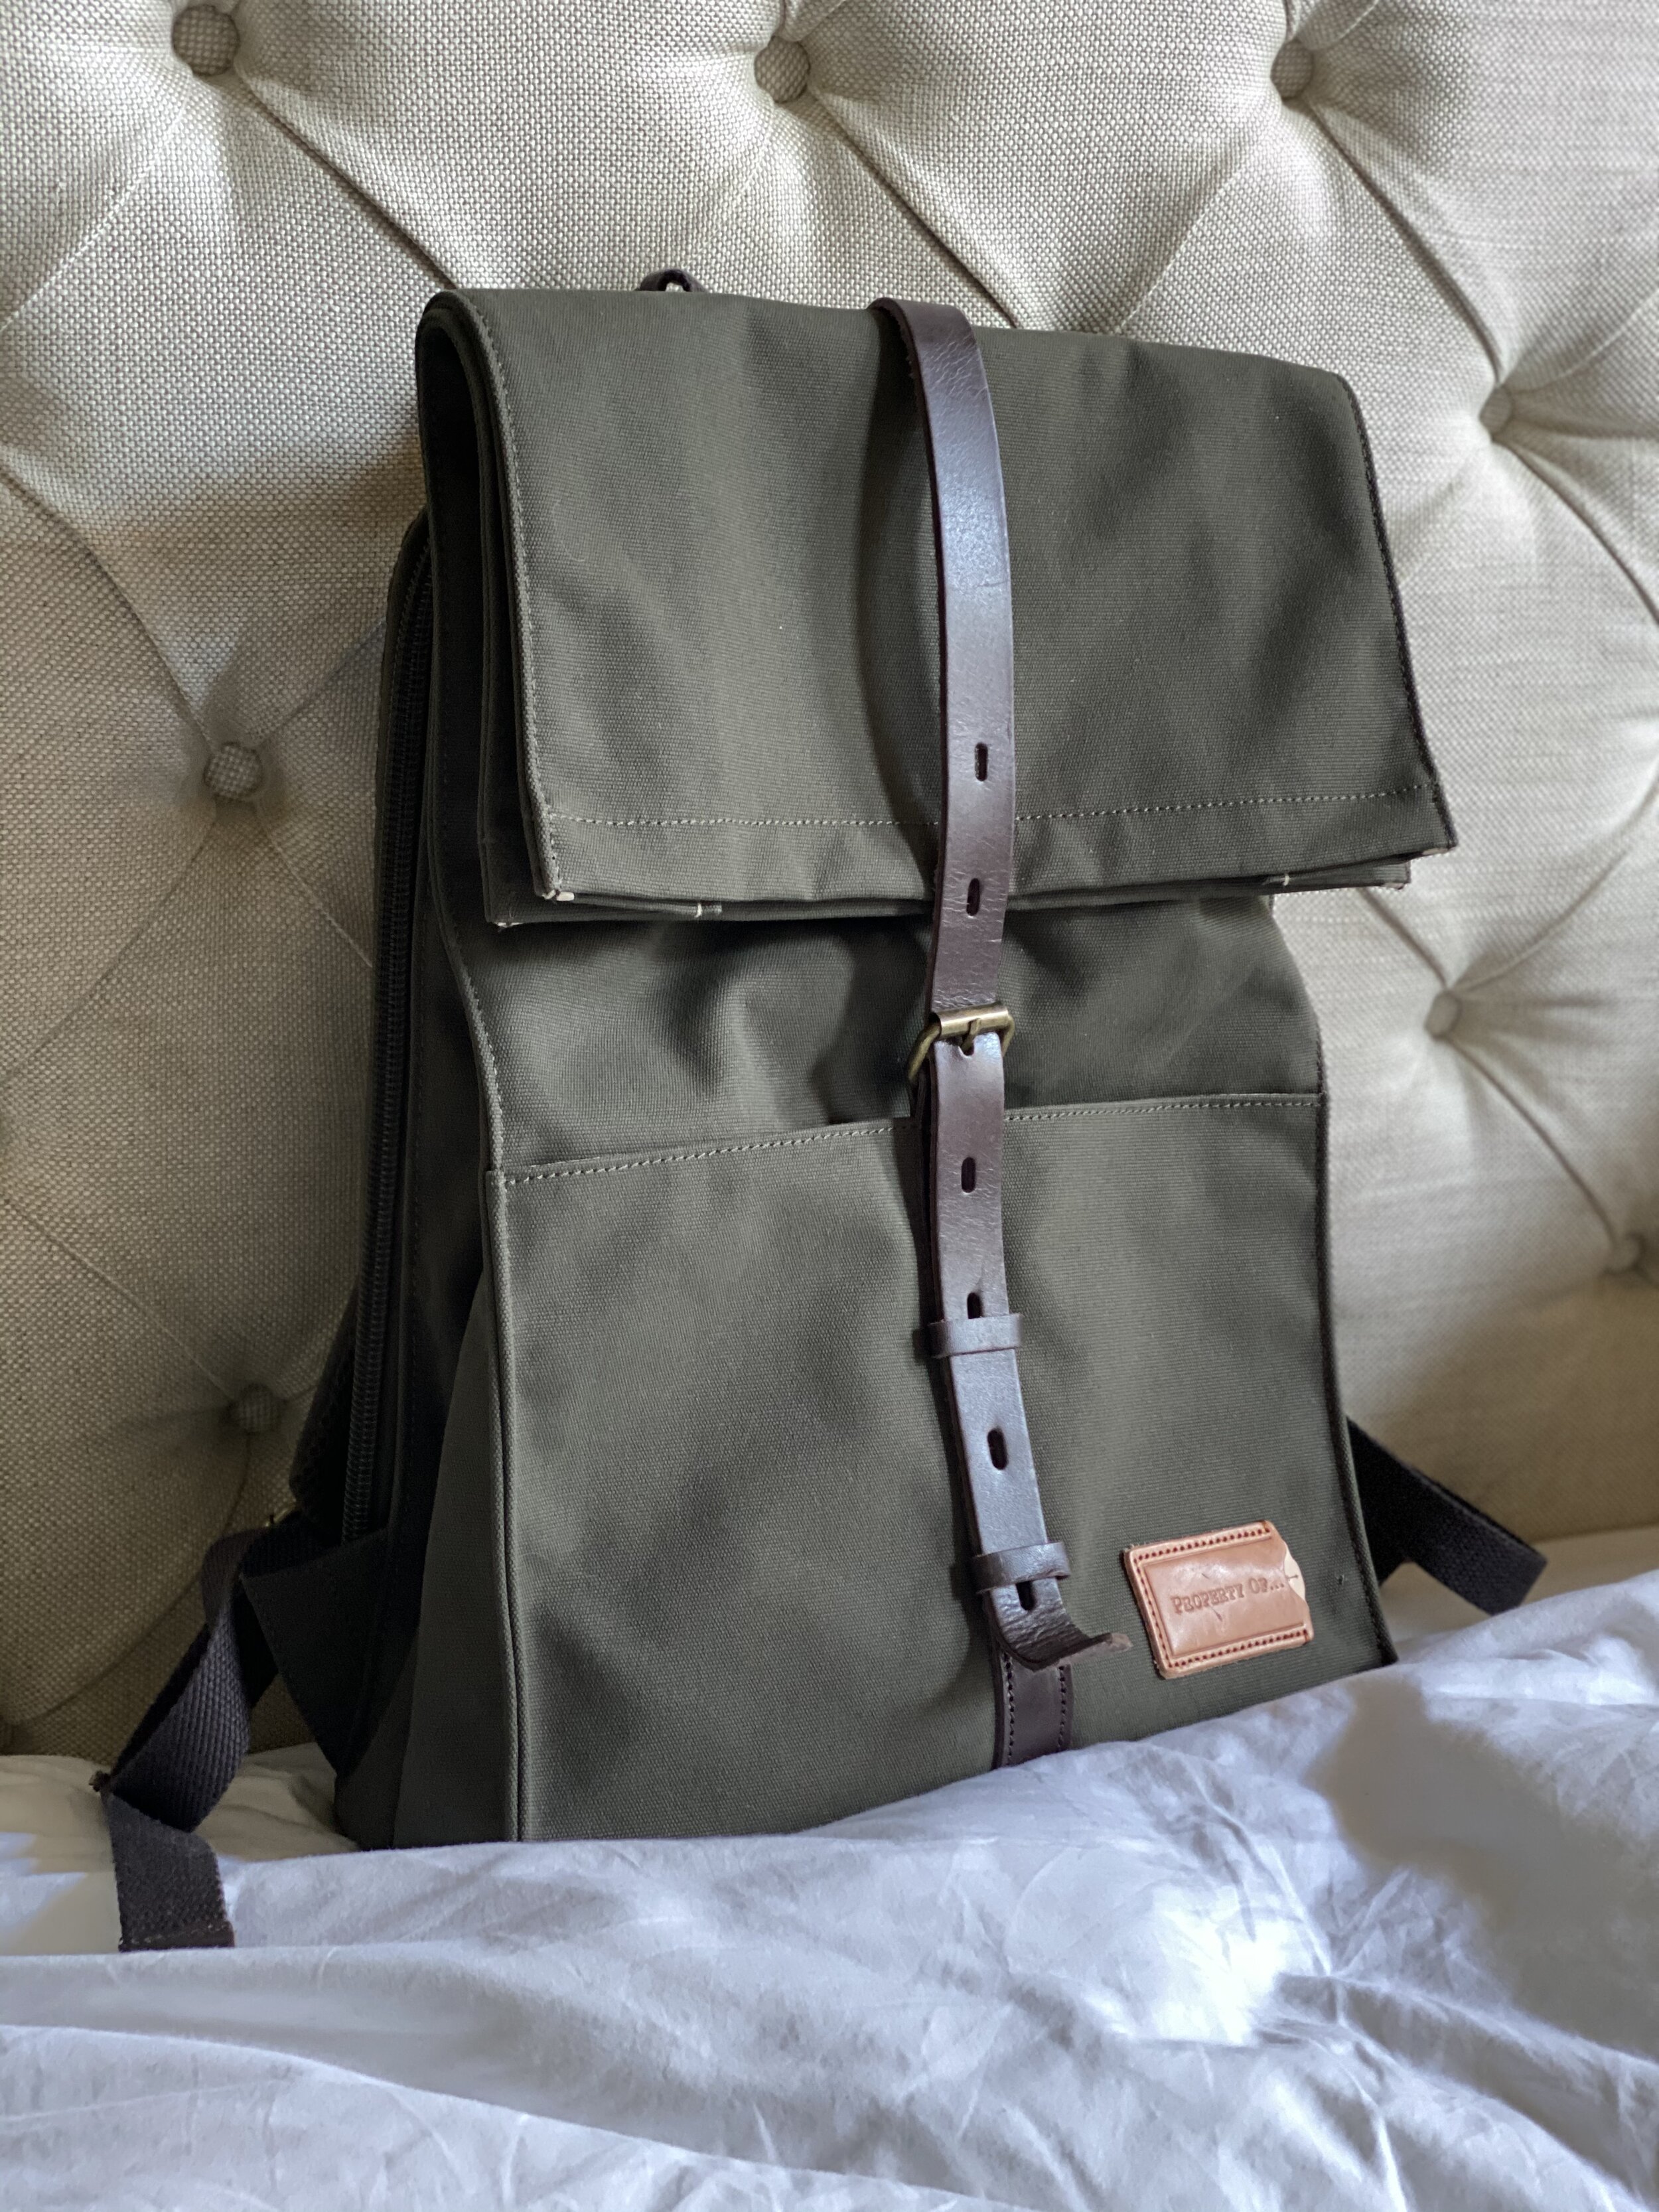
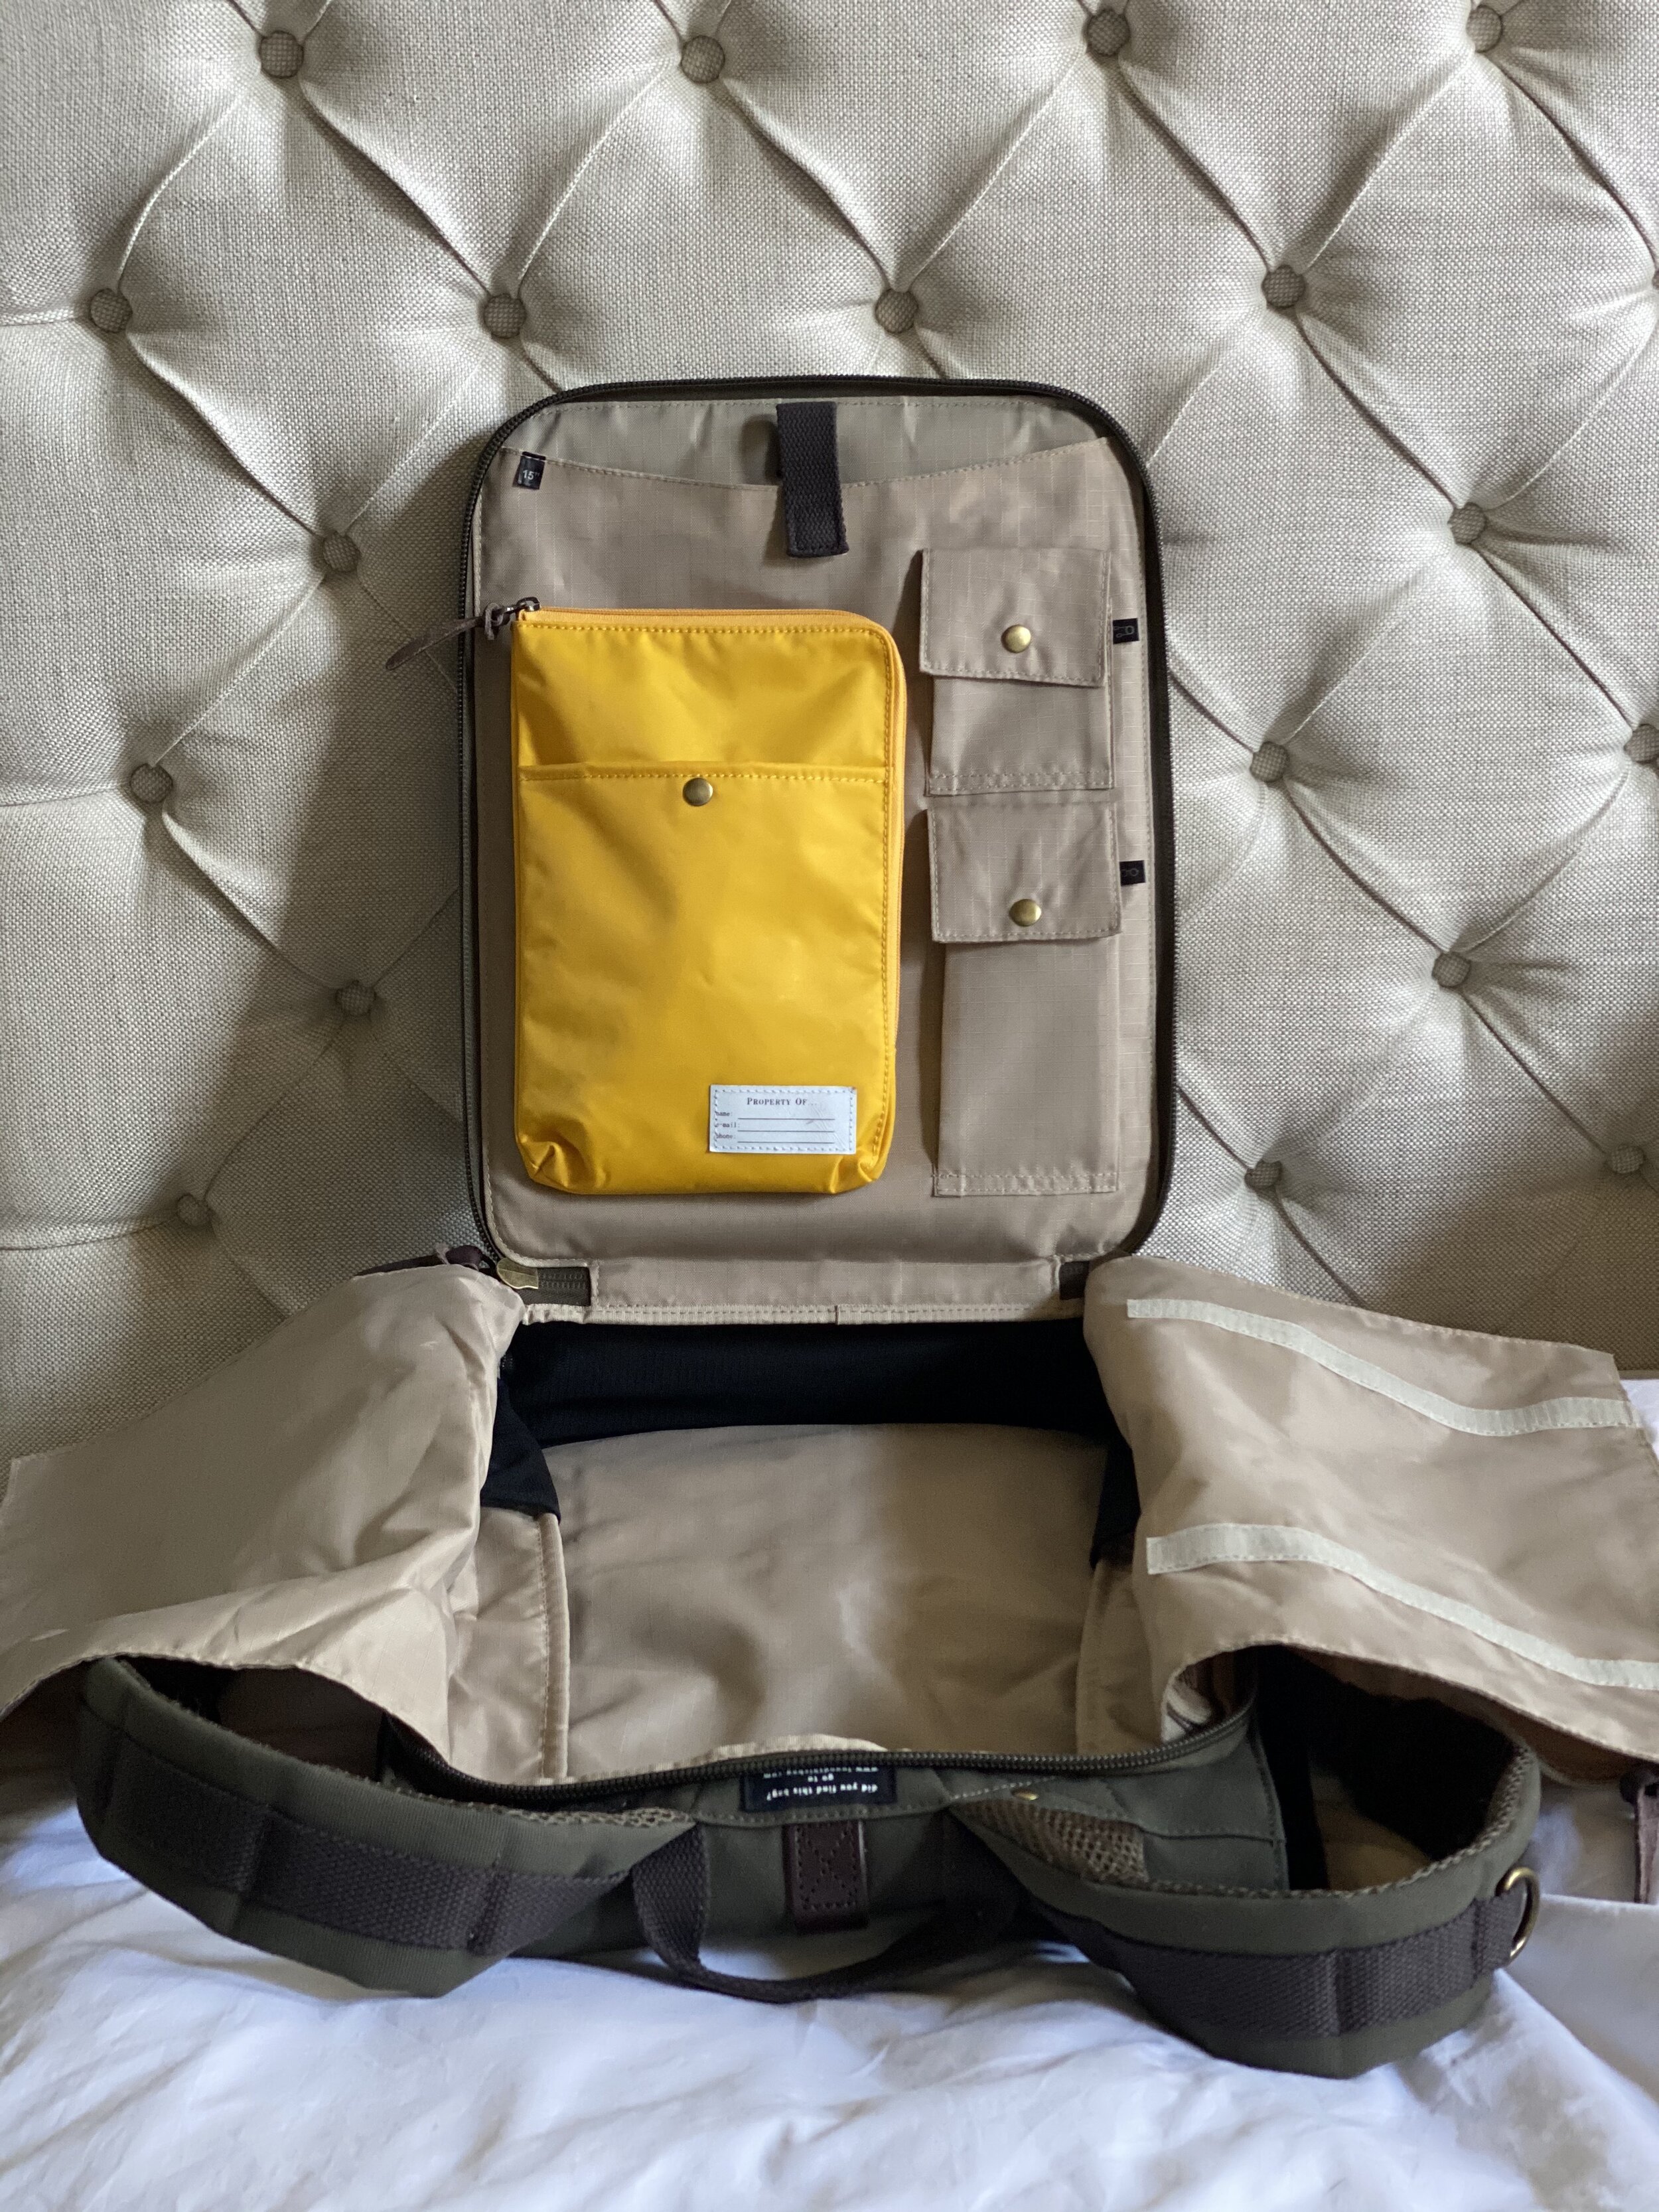
Property Of…Alex 24h Backpack
When you’re hauling expensive electronics around the world, they need a safe place to go that’s also manageable to carry. I NEVER check luggage containing my laptop, camera, or drone, but prefer to keep them in a carry-on where they’re much less likely to get stolen or damaged. While in the Netherlands, I stumbled upon a very leafy storefront advertising “Travel Gear for the Global Citizen”. That store was called Property Of, and as their target demographic, I couldn’t help but walk inside. What I found was an assortment of amazing waterproof backpacks (amongst other things) made from recycled PET bottles and the friendliest customer service you can possibly imagine. I was sold when I saw that the bags opened up from the back and could be packed like a suitcase. They include a 15” sleeve for a laptop, lots of handy pockets, a padded back panel and straps, and a free, worldwide lost and found service. At €169, the price tag was a bit steep, but with a 3 year warranty and all the features I’d been looking for, I decided it was an investment worth making.
My Computer
15” Macbook Pro
This is where all of the editing magic happens. Never have I ever…posted a photo that hasn’t been imported onto my laptop and edited in Lightroom first. Having a reliable Macbook with plenty of storage space (250 GB on this guy and I’m still constantly running out!) is a key part of my process.

Accessories
And now a few words about some physically small but monumentally important accessories! These items ensure my images are safe and able to load onto my computer properly.
SanDisk Memory Cards
I have quite the collection of memory cards, but if there’s one thing I’ve learned, it’s that you can never have enough. While memory cards differ in speed and capacity, I tend to gravitate towards purchasing several 64 GB cards rather than one larger, say, 128 GB card. It makes me feel like I’m diversifying should something happen to one. Because I’m working with large file sizes, the Extreme (150 mb/s) and Extreme Pro (170 mb/s) cards work well and aren’t too slow to load. If you get a slow memory card that can’t handle your large files, photography is about to become a lot less enjoyable.
SanDisk Extreme Portable SSD - 2TB
Ok, this is important, so listen up. Make sure you have a super reliable hard drive, and back up ALL of your photos to the cloud as soon as you possibly can. I once lost YEARS of my travel photos when my Seagate hard drive crashed. I accidentally pulled it out of my computer’s USB port, resulting in a forced eject. It had happened many times before without issue, but this time, the hard drive bit the dust and the photos were unrecoverable. I got lazy about my backups and trusted it with my photos, which ended up being a devastating mistake! I recently bought this SanDisk Extreme Portable SSD because it’s small, light, fast, and water, dust and shock-resistant.
HooToo USB C Hub
Apple did a silly, silly thing when they decided to get rid of USB ports on their Macbook Pros. As a solution, I bought this dongle which has been helpful for a few reasons. It has several USB ports, an HDMI port (for when I want to connect my laptop to a TV), and a memory card slot. I plug this into my computer, pop my memory card in, and voila- I can import or browse my images.

And there you have it- a detailed look inside my camera bag. Questions about any of the equipment? Drop them in the comments below. Happy shooting!